")
How to Create a Photo Wall to Showcase Your Family History

Every family has a story, and a photo wall is a beautiful way to tell yours. From cherished memories to milestone moments, a photo wall lets you celebrate your family’s journey while adding a personal touch to your home. Whether you’re showcasing vintage photos or modern snapshots, this creative project is both meaningful and fun. Good health lets you enjoy life’s precious moments. Visit SeniorHMOPPOplans.com to explore health plans designed for your vibrant lifestyle. Step-by-Step Guide to Creating Your Photo Wall Choose Your Wall Space: Select a prominent location like the living room, hallway, or a cozy corner. Ensure the space is well-lit to highlight your photos. Select Your Photos: Curate a mix of vintage and recent photos that capture meaningful moments. Include portraits, candid shots, and special occasions to tell a complete story. Decide on a Layout: Grid Pattern: Arrange photos in neat rows and columns for a clean look. Gallery Style: Mix and match different sizes and orientations for a creative touch. Themed Sections: Divide the wall into sections, such as “Family Vacations” or “Generations.” Pick Your Frames: Choose frames that complement your home’s decor. Matching frames offer a cohesive look, while a mix of styles adds charm. Consider lightweight frames or adhesive-backed options for easier installation. Add Personal Touches: Incorporate memorabilia like postcards, handwritten notes, or small keepsakes. Use decals or stencils to add quotes or phrases like “Family is Forever.” Hang Your Photos: Lay out the arrangement on the floor before committing to the wall. Use a level and measuring tape to ensure even spacing and alignment. Attach frames securely with nails, hooks, or adhesive strips. Practical Tips for Success Digital Tools: Use apps or software to design your layout virtually before hanging photos. High-Quality Prints: Ensure your photos are printed on durable paper to prevent fading over time. Update Regularly: Swap out photos occasionally to keep the display fresh and current. Involve Loved Ones: Turn the project into a family activity by gathering input and sharing stories as you select photos. Common Questions Answered What’s the best way to choose photos for a photo wall? Focus on images that evoke emotion and represent meaningful moments. Variety is key—mix group shots, individual portraits, and scenic captures. How can I make the display more interactive or unique? Add QR codes linked to family videos or audio recordings of stories behind the photos. Include an area for guests to write notes or add their favorite photos when they visit. Do I need professional tools to create a photo wall? Not at all! Basic tools like a hammer, measuring tape, and adhesive strips are sufficient for most setups. Why Photo Walls Are Perfect for Seniors A photo wall is more than just decoration—it’s a celebration of your family’s history and a way to preserve cherished memories. For seniors, it’s an opportunity to reflect on life’s special moments, share stories with loved ones, and leave a visual legacy for future generations. Imagine walking past your photo wall and seeing the smiling faces of your children, grandchildren, and even great-grandchildren. Picture the joy of reminiscing with friends and family as they admire the display. A photo wall isn’t just art—it’s a reminder of the love and connections that define your life. Start your photo wall today and bring your family’s story to life! For more inspiration, visit SeniorSearching.com.
How to Create a Memory Jar: A Simple Way to Cherish Everyday Moments

Every day holds special moments worth remembering. From a kind word to a shared laugh, these little joys can brighten your life when revisited. A memory jar is a simple and heartfelt way to capture these moments, creating a keepsake that grows with time. Whether you enjoy this as a solo project or with loved ones, a memory jar is a beautiful reminder of life’s blessings. Good health lets you enjoy life’s little moments. Visit SeniorHMOPPOplans.com to explore health plans designed for your vibrant lifestyle. Step-by-Step Guide to Creating a Memory Jar Choose Your Jar: Pick a jar that suits your style. A clear mason jar, decorative vase, or even a repurposed cookie jar works perfectly. Ensure it’s easy to open and large enough to hold many memories. Decorate Your Jar: Personalize it with ribbons, stickers, or a handwritten label like “Our Family Memories” or “Moments of Joy.” Use colorful markers, paint, or washi tape to make it uniquely yours. Prepare Your Supplies: Gather slips of paper or small notecards in various colors to add vibrancy. Keep a pen or marker handy near the jar for easy access. Start Collecting Memories: Write down meaningful moments, achievements, or even funny quotes. Include the date for added context. Examples: “May 15th: Enjoyed a beautiful sunset with Jane.” “June 2nd: Received a sweet call from my grandson.” Share the Tradition: Invite family members to contribute their own memories. Place the jar in a communal area like the living room or kitchen. Set milestones to read the memories together, such as on New Year’s Eve or a family gathering. Practical Tips for Success Create Themes: Focus on specific topics like gratitude, family moments, or personal milestones. Make It a Routine: Add a memory daily, weekly, or whenever something special happens. Use Visual Aids: Include photos, tickets, or small mementos alongside written notes. Explore Variations: Try digital memory jars using apps or create multiple jars for different themes. Common Questions Answered What types of memories should I include? Anything that brings you joy or gratitude! This could be a meaningful conversation, a goal achieved, or a moment of kindness. How often should I add to my memory jar? As often as you like. Some people add memories daily, while others focus on big moments throughout the year. Can a memory jar be a family activity? Absolutely! Encourage everyone to contribute, making it a collective keepsake that strengthens family bonds. Why Memory Jars Are Perfect for Seniors A memory jar isn’t just a container—it’s a celebration of life’s precious moments. For seniors, it’s a way to reflect on the past, cherish the present, and look forward to the future. This simple project fosters mindfulness, gratitude, and connection with loved ones. Imagine sitting with your family, reading through a jar full of heartfelt notes and memories. Picture the joy of revisiting moments that made you smile, laugh, or feel proud. A memory jar captures the beauty of everyday life, reminding you of all there is to be thankful for. Start your memory jar today and treasure the moments that matter most! For more inspiration, visit SeniorSearching.com.
How to Start a Genealogy Project: Trace Your Family Roots
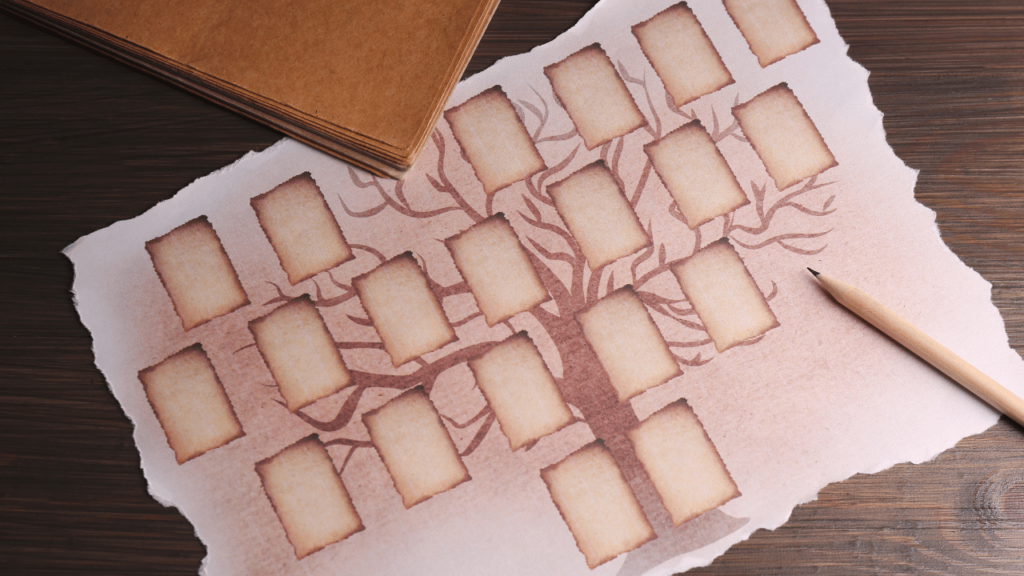
Discovering your family’s history can be a fascinating and rewarding journey. A genealogy project allows you to uncover your roots, connect with your heritage, and share your story with future generations. Whether you’re exploring old photographs, listening to family tales, or diving into online archives, tracing your family’s history is a meaningful way to celebrate your legacy. Good health supports every part of your journey. Visit SeniorHMOPPOplans.com to explore health plans designed for your vibrant lifestyle. Step-by-Step Guide to Starting Your Genealogy Project Gather What You Already Have: Start by collecting family documents, such as birth certificates, marriage records, and old photographs. Talk to relatives and record their stories and memories. Even small details can provide valuable clues. Create a Family Tree: Use a notebook or genealogy software to begin documenting names, dates, and relationships. Start with yourself and work backward, adding parents, grandparents, and beyond. Use Online Resources: Explore genealogy websites like Ancestry.com or FamilySearch.org to access public records and build your tree. Search census data, immigration records, and military archives for additional information. Visit Local Archives and Libraries: Check historical societies, libraries, and courthouse archives for records that might not be available online. Look for obituaries, land deeds, and church records that can provide deeper insights. Connect with Distant Relatives: Reach out to extended family members who may have knowledge or documents to share. Consider using social media or genealogy forums to connect with others researching the same lineage. Preserve Your Findings: Organize your discoveries in a scrapbook, digital file, or printed family history book. Label photos and documents with names and dates to ensure future generations can easily understand them. Practical Tips for Success Start Small: Focus on one branch of your family tree to avoid feeling overwhelmed. Document Sources: Keep track of where each piece of information comes from to verify its accuracy. Ask Questions: Don’t be afraid to ask relatives about their memories, even if they seem unrelated—they might reveal unexpected connections. Be Patient: Genealogy is a process that takes time and persistence, but each discovery is worth the effort. Common Questions Answered What’s the best way to start a genealogy project? Begin with what you know and gather information from family members and documents. Use online tools and libraries to expand your research. How can I involve family members in the process? Share your progress with relatives and invite them to contribute stories, photos, and records. Collaborative efforts often uncover hidden gems. Do I need to be tech-savvy to trace my family roots? Not at all! While technology can enhance your search, traditional methods like visiting libraries and talking to family members are equally effective. Why Genealogy Is Perfect for Seniors A genealogy project is more than a hobby—it’s a journey of discovery and connection. For seniors, it’s an opportunity to reflect on your heritage, strengthen family bonds, and leave a legacy for future generations. By tracing your family roots, you’re preserving stories that might otherwise be forgotten. Imagine the joy of uncovering a long-lost photograph of your ancestors or finding out you’re related to someone famous. Picture your grandchildren learning about their heritage through the family tree you’ve built. Genealogy isn’t just about the past—it’s about bringing families together and celebrating the richness of your history. Start your genealogy project today and uncover the story of your family! For more inspiration, visit SeniorSearching.com.
The Art of Letter Writing: Reviving a Timeless Tradition

There’s something magical about receiving a handwritten letter. In today’s fast-paced digital world, taking the time to put pen to paper feels personal, thoughtful, and deeply meaningful. Letter writing is more than just communication—it’s an art form that connects hearts, revives memories, and captures moments that can be cherished forever. Good health lets you cherish moments that matter most. Visit SeniorHMOPPOplans.com to explore health plans designed for your vibrant lifestyle. Step-by-Step Guide to Writing Thoughtful Letters Choose Your Tools: Select stationery that reflects your personality, such as elegant note cards, colorful paper, or vintage-style sheets. Invest in a smooth-writing pen or even experiment with calligraphy for an artistic touch. Set the Mood: Find a quiet, comfortable space where you can focus without distractions. Light a candle or play soft music to make the experience enjoyable and calming. Start with a Warm Greeting: Address the recipient by name and begin with a heartfelt salutation, such as “Dear [Name],” or “My Dearest [Name].” Share Your Thoughts: Write about your day, a recent experience, or a cherished memory. Include personal updates, kind words, and expressions of gratitude to make the letter meaningful. Add Personal Touches: Decorate your letter with small doodles, stickers, or pressed flowers. Include a photo, poem, or recipe to make the letter extra special. End on a High Note: Close with a heartfelt message, such as “Thinking of you always,” or “With all my love.” Sign your name in a way that feels personal and warm. Practical Tips for Embracing the Art of Letter Writing Reconnect With Old Friends: Reach out to loved ones you haven’t spoken to in a while. A letter is a beautiful way to bridge the distance and rekindle relationships. Find New Pen Pals: Join online groups or clubs that connect people interested in letter writing. Exchanging letters with new friends can be exciting and inspiring. Explore Unique Stamps: Visit your local post office or shop online for decorative stamps that make your letters stand out. Preserve Letters: Keep letters you receive in a special box or scrapbook to revisit them in the future. Common Questions Answered Why is letter writing still important in the digital age? Handwritten letters offer a personal touch that emails and texts can’t replicate. They show thoughtfulness and create lasting keepsakes. How can I make my letters more creative? Experiment with colors, embellishments, and themes. For instance, write a letter as if you’re telling a story or reflecting on a shared memory. What if I don’t know what to write? Start with a simple question, like “How have you been?” or share something about your day to get the conversation going. Why Letter Writing Is Perfect for Seniors Letter writing is a calming, reflective activity that allows you to connect with others while preserving your stories and thoughts. For seniors, it’s an opportunity to revisit cherished memories, express gratitude, and share wisdom with loved ones. Writing letters also provides a sense of purpose and joy as you create something truly meaningful. Imagine the smile on a friend’s face as they open a beautifully written letter from you. Picture the satisfaction of holding a completed letter, knowing it carries a piece of your heart to someone special. This timeless tradition enriches relationships and leaves a lasting legacy of love and connection. Rediscover the joy of letter writing today! For more inspiration, visit SeniorSearching.com.
The Joy of Journaling: A Simple Hobby for Relaxation and Reflection

Every day is filled with stories, thoughts, and moments worth remembering. Journaling is more than just putting words on paper—it’s a powerful way to capture your experiences, reflect on your journey, and nurture your emotional well-being. Whether you’re looking for a calming daily ritual or a creative outlet, journaling offers endless possibilities to enrich your life. Good health is the foundation of self-discovery. Visit SeniorHMOPPOplans.com to explore health plans designed for your well-being. Step-by-Step Guide to Starting Your Journaling Journey Find Your Perfect Journal: Choose a notebook or journal that inspires you. Whether it’s a sleek leather-bound book or a simple spiral notebook, pick something that feels right. Select Your Writing Tools: A good pen or pencil makes all the difference. Some prefer colorful pens for creativity, while others stick to classic black or blue ink. Set Up a Journaling Routine: Decide on a time of day when you can write without interruptions. Morning reflections or evening wind-downs are popular choices. Choose Your Style: Free Writing: Let your thoughts flow naturally, without worrying about grammar or structure. Prompt-Based Writing: Use daily prompts to spark inspiration. For example: “What made me smile today?” “What am I grateful for?” Themed Journaling: Focus on specific topics like travel, family stories, or personal goals. Practical Tips for Successful Journaling Start Small: Write just a few sentences a day to build the habit. Be Honest: Your journal is a safe space to express yourself without judgment. Add Personal Touches: Include doodles, pressed flowers, or photos to make your journal unique. Keep It Handy: Place your journal somewhere accessible, like your nightstand or favorite chair. Common Questions Answered What are the mental health benefits of journaling? Journaling helps reduce stress, boost memory, and improve emotional clarity. It’s a therapeutic way to process thoughts and emotions. Can I journal if I don’t like writing? Absolutely! Try bullet journaling or use drawings and symbols to express yourself. There’s no right or wrong way to journal. How do I stay consistent? Set reminders or pair journaling with another routine, like enjoying your morning coffee or winding down before bed. Why Journaling Is Perfect for Seniors Journaling is a versatile hobby that provides both relaxation and personal growth. For seniors, it’s a chance to reflect on life’s journey, celebrate achievements, and capture wisdom for future generations. It also encourages mindfulness, helping you focus on the present moment while fostering gratitude and positivity. Imagine the joy of revisiting your entries years from now or sharing your journal with loved ones to give them a glimpse into your thoughts and experiences. Journaling is more than a hobby—it’s a legacy of your unique perspective and creativity. Start your journaling journey today! For more inspiration and ideas, visit SeniorSearching.com.
How to Create a Time Capsule: Preserve Your Legacy for Future Generations

Imagine leaving a snapshot of your life for future generations to discover. A time capsule is a unique and meaningful way to preserve your memories, stories, and treasures. By creating a time capsule, you’re not just storing objects—you’re building a bridge to the future, allowing your family and friends to connect with your legacy. Good health supports every part of your journey. Visit SeniorHMOPPOplans.com to explore health plans designed for your vibrant lifestyle. Step-by-Step Guide to Creating a Time Capsule Choose a Theme or Purpose: Decide what you want your time capsule to represent. Is it a snapshot of your daily life, a collection of family memories, or a record of a specific event? Consider who the intended audience is—your grandchildren, future family members, or even your future self. Select a Container: Use a sturdy, waterproof container to protect your items. Metal or plastic containers with tight seals work well. For added protection, line the container with a plastic bag or silica packets to keep moisture out. Pick the Perfect Location: Choose a safe, accessible spot to bury or store your time capsule. Options include your backyard, a closet, or even a safe deposit box. Label the location or create a map to ensure it’s easy to find later. Gather Items to Include: Select meaningful objects that represent your life, such as: Photos, letters, or journals. Small keepsakes, like jewelry or coins. Newspaper clippings or popular magazines. A USB drive with digital photos, videos, or a recorded message. Avoid perishable items or anything that could degrade over time. Seal and Protect Your Capsule: Wrap delicate items in protective materials like bubble wrap or archival paper. Ensure the container is securely sealed to prevent damage from water, pests, or time. Set an Opening Date: Decide when the time capsule should be opened. Choose a meaningful date, like a family milestone or a specific number of years in the future. Write the opening date on the container or in a note stored with it. Practical Tips for Success Include a Letter: Write a heartfelt letter to the future, sharing your hopes, dreams, and reflections. Document Everything: Create an inventory of the items in your time capsule and keep a copy with your records. Get Creative: Decorate your container or include themed items that reflect your personality or the era. Involve Loved Ones: Turn the process into a family activity by inviting others to contribute their own items and ideas. Common Questions Answered What’s the best way to preserve items in a time capsule? Use archival-quality materials and avoid items that could decay, like food or liquids. Seal everything securely to protect against environmental damage. Where should I store my time capsule? Choose a location that’s safe and unlikely to be disturbed. If burying it, use a waterproof container and mark the spot with a map or coordinates. How long should a time capsule be stored? The timeline is up to you! Many time capsules are designed to be opened after 10, 25, or even 50 years. Why Time Capsules Are Perfect for Seniors A time capsule is more than a box—it’s a gift to the future and a way to reflect on your life’s journey. For seniors, creating a time capsule offers an opportunity to document your legacy, celebrate your memories, and connect with loved ones in a unique way. Imagine your grandchildren opening a time capsule years from now, discovering your photos, letters, and treasures. Picture the joy and curiosity as they learn about your life and the era you lived in. A time capsule isn’t just a collection of items—it’s a story, a connection, and a legacy that will last for generations. Start your time capsule today and preserve your legacy for the future! For more inspiration, visit SeniorSearching.com.
How to Create a Vision Board: Manifest Your Dreams and Goals

A vision board is more than just a collage—it’s a powerful tool for turning dreams into reality. By visually representing your goals and aspirations, a vision board keeps you focused and motivated to achieve what matters most to you. Whether it’s traveling, learning a new skill, or improving your health, creating a vision board helps you manifest the life you want. Good health supports every dream. Visit SeniorHMOPPOplans.com to explore health plans designed for your vibrant lifestyle. Step-by-Step Guide to Creating Your Vision Board Clarify Your Goals: Take time to reflect on what you want to achieve. Ask yourself: What areas of my life do I want to improve? What dreams have I always wanted to pursue? What brings me joy and fulfillment? Gather Your Supplies: You’ll need: A board (corkboard, foam board, or poster board). Magazines, printed images, or photos. Scissors, glue, and markers. Decorative items like stickers, washi tape, or fabric. Choose Your Images and Words: Look for images, quotes, and words that resonate with your goals and inspire you. Examples: A picture of a beach for a dream vacation. The word “health” for wellness aspirations. A photo of family to represent stronger connections. Arrange and Assemble: Lay out your images and words on the board without gluing them down to find a pleasing arrangement. Group similar themes together (e.g., travel, health, hobbies). Once satisfied, secure everything in place with glue or pins. Display Your Vision Board: Place your board somewhere visible, like your bedroom or workspace, to keep your goals front and center. Spend a few minutes each day visualizing the life you’re working toward. Practical Tips for Success Keep It Positive: Focus on what you want to achieve rather than what you want to avoid. Update Regularly: Refresh your vision board as your goals evolve or when you achieve milestones. Be Specific: Include detailed images or phrases that clearly represent your dreams. Make It Yours: Customize your board to reflect your unique style and personality. Common Questions Answered What should I include on my vision board? Include anything that inspires and motivates you—photos, affirmations, quotes, and even small objects. Do I need artistic skills to create a vision board? Not at all! The focus is on creating something meaningful to you, not on making it look perfect. How often should I update my vision board? Update it whenever your goals change or you achieve significant milestones. Many people refresh their boards annually. Why Vision Boards Are Perfect for Seniors A vision board isn’t just for planning—it’s for dreaming, focusing, and celebrating life’s possibilities. For seniors, it’s a way to stay inspired, set new goals, and look forward to the future with excitement. Whether you’re envisioning a big adventure, pursuing a new hobby, or deepening relationships, a vision board keeps your aspirations alive and tangible. Imagine seeing your vision board every day, reminding you of the exciting possibilities ahead. Picture achieving the goals you’ve visualized, step by step. A vision board isn’t just a project—it’s a pathway to a life filled with purpose and joy. Start your vision board today and manifest the life you’ve always dreamed of! For more inspiration, visit SeniorSearching.com.
How to Start a New Hobby After Retirement: Tips to Explore Your Passions
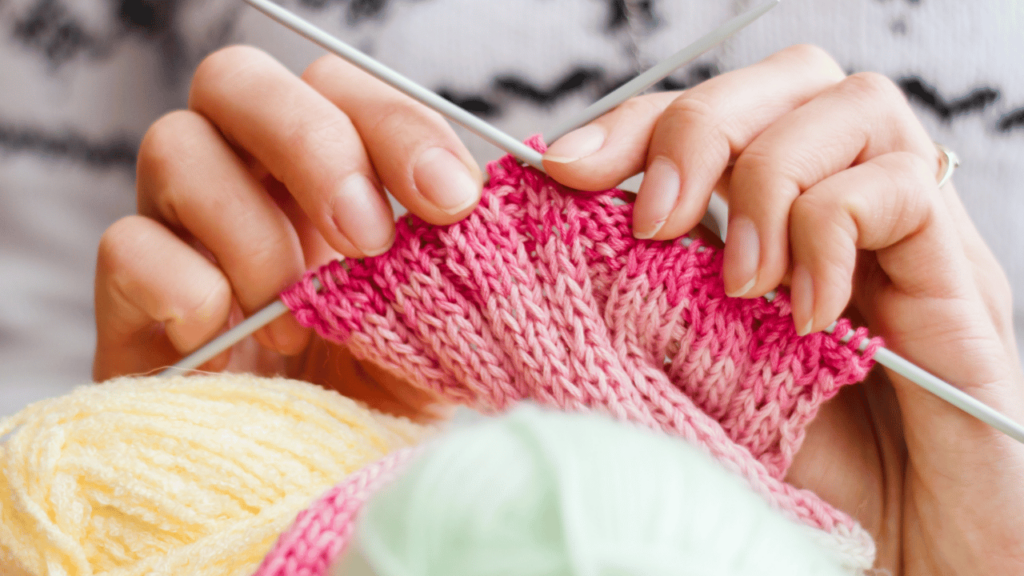
Retirement is a golden opportunity to rediscover yourself and dive into activities that bring joy and fulfillment. Starting a new hobby can keep your mind sharp, boost your mood, and even introduce you to new friends. Whether you’ve always wanted to paint, garden, or learn a musical instrument, there’s no better time to explore your passions. Good health supports every adventure. Visit SeniorHMOPPOplans.com to explore health plans designed for your vibrant lifestyle. Step-by-Step Guide to Starting a New Hobby Reflect on Your Interests: Think about what excites or intrigues you. Ask yourself: What activities have I always wanted to try? What skills or talents do I want to develop? What makes me feel relaxed or energized? Explore Your Options: Consider hobbies that align with your lifestyle and preferences: Creative Hobbies: Painting, knitting, photography, or writing. Active Hobbies: Yoga, hiking, dancing, or gardening. Social Hobbies: Book clubs, cooking classes, or volunteering. Skill-Building Hobbies: Learning a new language, playing an instrument, or taking online courses. Start Small: Begin with introductory classes or tutorials to test the waters. Invest in basic materials or equipment before committing to larger purchases. Set Realistic Goals: Define what success looks like for you—whether it’s mastering a skill or simply enjoying the process. Schedule dedicated time for your hobby each week to build consistency. Join a Community: Connect with others who share your interests by joining local clubs, groups, or online forums. Social interaction can make hobbies more enjoyable and motivating. Celebrate Your Progress: Document your journey with photos or a journal. Share your achievements with friends and family to stay inspired. Practical Tips for Success Stay Open-Minded: Be willing to try new things and step out of your comfort zone. Learn at Your Own Pace: Enjoy the process without pressuring yourself to excel immediately. Seek Inspiration: Follow blogs, watch videos, or read books related to your hobby. Combine Hobbies: Blend activities, like photography and hiking, for a richer experience. Common Questions Answered What if I don’t know where to start? Begin with something that piques your curiosity or try a few different activities to discover what resonates with you. Can I pick up a hobby I enjoyed in the past? Absolutely! Reconnecting with a hobby you once loved can be incredibly rewarding. What if I lose interest in my new hobby? That’s okay! Explore other options until you find something that truly excites you. Why Starting a Hobby Is Perfect for Seniors Hobbies aren’t just pastimes—they’re pathways to self-discovery, creativity, and joy. For seniors, exploring new interests brings a sense of purpose and can enrich daily life. Whether you’re looking to stay active, express yourself, or connect with others, hobbies offer endless opportunities to grow and thrive. Imagine the satisfaction of finishing your first painting, growing your own vegetables, or learning a song on the guitar. Picture the laughter shared in a cooking class or the peace of a quiet moment spent writing in your journal. Starting a new hobby isn’t just an activity—it’s a celebration of the life you’ve built and the adventures still ahead. Start your hobby journey today and discover the joy of exploring your passions! For more inspiration, visit SeniorSearching.com.
How to Start a Miniature Painting Hobby After Retirement
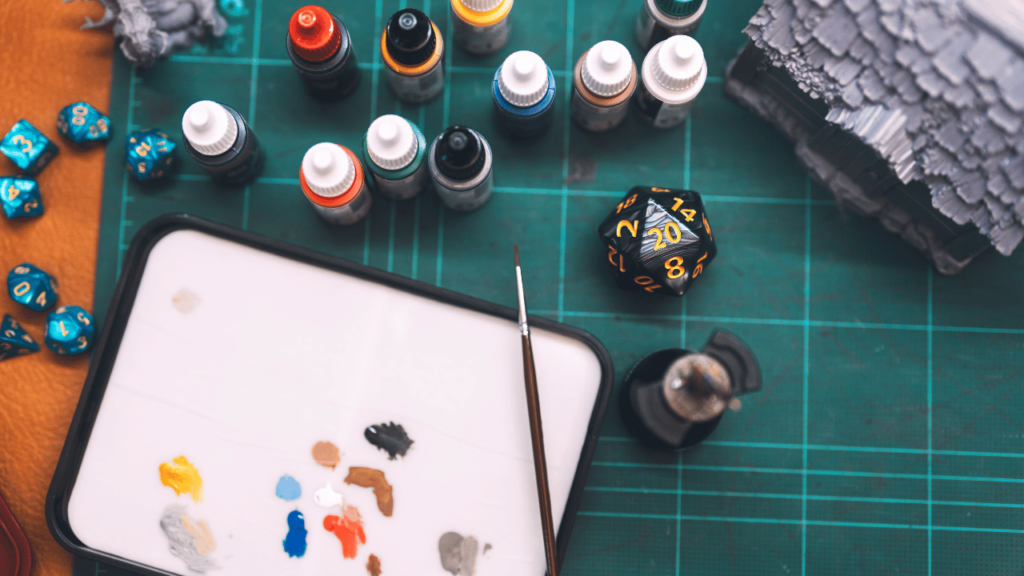
Retirement is the perfect time to explore hobbies that spark joy and relaxation. One creative pastime that’s gaining popularity among retirees is miniature painting. Whether you’re painting model figurines, tiny landscapes, or intricate dollhouse pieces, this hobby offers endless opportunities for creativity and focus. At SeniorSearching.com, we’re committed to inspiring you with fresh and exciting activities for your golden years. And remember, good health is essential to enjoy these hobbies. That’s why we’re proud to be sponsored by SeniorHMOPPOplans.com, helping seniors like you find the perfect health plan to support your lifestyle. Why Try Miniature Painting? Miniature painting is more than just a hobby—it’s a meditative activity that sharpens focus and enhances hand-eye coordination. Studies suggest that engaging in artistic hobbies can reduce stress and promote mental well-being, making it an excellent choice for retirees. Getting Started Follow these steps to begin your journey into the world of miniature painting: Choose Your Materials: Start with basic supplies such as miniature figures, acrylic paints, fine brushes, and a palette. Local hobby stores or online retailers like Amazon are great resources. Set Up a Workspace: Create a well-lit, clutter-free area for painting. A small desk or table near a window works perfectly. Learn Basic Techniques: Watch beginner-friendly YouTube tutorials to learn techniques like base coating, dry brushing, and shading. Start Simple: Begin with easy projects like single-color models and gradually progress to more intricate designs. Join a Community: Connect with other miniature painters through local art classes or online forums to share tips and showcase your work. Tips for Success Take Your Time: Miniature painting is about patience and precision. Enjoy the process without rushing. Experiment with Colors: Don’t be afraid to try bold color combinations to make your miniatures unique. Invest in Quality Tools: High-quality brushes and paints can make a significant difference in your results. FAQs Q: Is miniature painting expensive? A: Not at all! Starter kits are affordable, and many materials can be reused for multiple projects. Q: Do I need artistic skills to start? A: No prior skills are required. Miniature painting is beginner-friendly, and you’ll improve with practice. Q: Can this hobby be done in small spaces? A: Yes! Miniature painting requires minimal space, making it ideal for apartments or small homes. Discover More at SeniorSearching.com Miniature painting is a wonderful way to unwind and express yourself during retirement. Explore this and many more inspiring activities on SeniorSearching.com, your trusted resource for senior-friendly hobbies and lifestyle tips. And don’t forget, good health ensures you can fully enjoy these creative pursuits. Visit SeniorHMOPPOplans.com today to find a health plan that keeps you vibrant and active!
How to Create Shadow Boxes to Preserve Family Memories
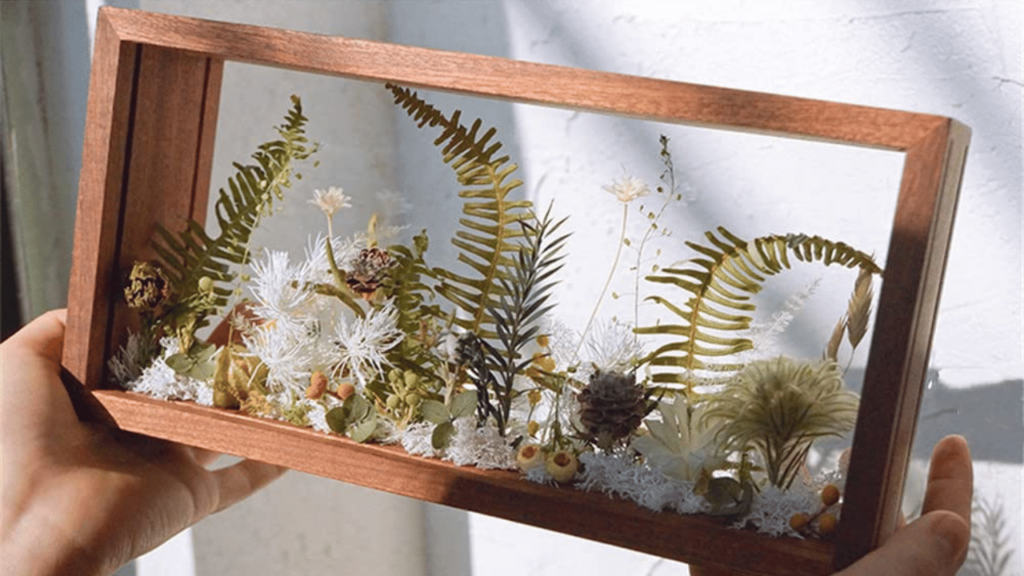
Cherished memories deserve a special place in our homes and hearts. Creating shadow boxes is a wonderful way to preserve family mementos while crafting something beautiful and meaningful. Whether it’s a tribute to a loved one, a collection of travel souvenirs, or a way to showcase treasured keepsakes, shadow boxes are a creative and heartfelt project for seniors. At SeniorSearching.com, we’re here to inspire you with activities that bring joy and meaning to your golden years. And because good health is vital to enjoy such hobbies, we’re proudly sponsored by SeniorHMOPPOplans.com, helping seniors find the best health plans to support their vibrant lifestyles. Why Make a Shadow Box? Shadow boxes are more than just a craft project—they’re a way to: Preserve Memories: Showcase meaningful items like photos, letters, and heirlooms. Express Creativity: Arrange keepsakes in a way that reflects your personal story. Decorate Your Home: Add a unique, sentimental touch to your living space. Connect with Family: Share stories and memories while working on the project together. Getting Started Here’s how to create your own shadow box in a few easy steps: Choose a Theme: Decide what story or memory you want to capture. Common themes include family milestones, vacations, or tributes to loved ones. Gather Your Materials: Shadow Box Frame: Available at craft stores or online. Keepsakes: Photos, small objects, dried flowers, or personal mementos. Background Material: Scrapbook paper, fabric, or painted cardboard. Adhesives: Glue dots, double-sided tape, or mounting squares. Optional Tools: Scissors, decorative embellishments, and a ruler. Prepare the Frame: Open the shadow box and clean the glass. Ensure the backing is sturdy enough to hold your items. Arrange Your Keepsakes: Lay out your items before attaching them. Experiment with different arrangements to find the perfect balance. Attach Items Securely: Use glue dots or tape to fix items to the backing. Ensure heavier objects are supported properly. Add Final Touches: Include decorative elements like ribbons, labels, or stickers to enhance your design. Close and Display: Secure the frame and display your shadow box in a place where it can be admired. Tips for Success Keep It Simple: Focus on a few meaningful items rather than overcrowding the box. Preserve Delicate Items: Use acid-free materials to protect photos and paper keepsakes. Involve Family Members: Turn the project into a collaborative activity with loved ones. Rotate Displays: Create multiple shadow boxes and swap them out seasonally for variety. FAQs Q: Can I use fragile or valuable items in a shadow box? A: Yes, but take precautions like using acid-free backing and UV-protective glass to prevent damage. Q: Do I need special tools to create a shadow box? A: Not at all! Basic craft supplies and household items are sufficient. Q: Where should I display my shadow box? A: Hang it on a wall or place it on a shelf in a prominent area where it can be appreciated. Discover More at SeniorSearching.com Creating shadow boxes is a meaningful way to preserve family memories while enjoying a relaxing and creative hobby. Explore more inspiring ideas at SeniorSearching.com, your trusted resource for seniors. And remember, good health ensures you can fully enjoy these activities. Visit SeniorHMOPPOplans.com today to find a health plan that supports your journey toward wellness and creativity!