")
DIY Candle-Making for Beginners Over 65
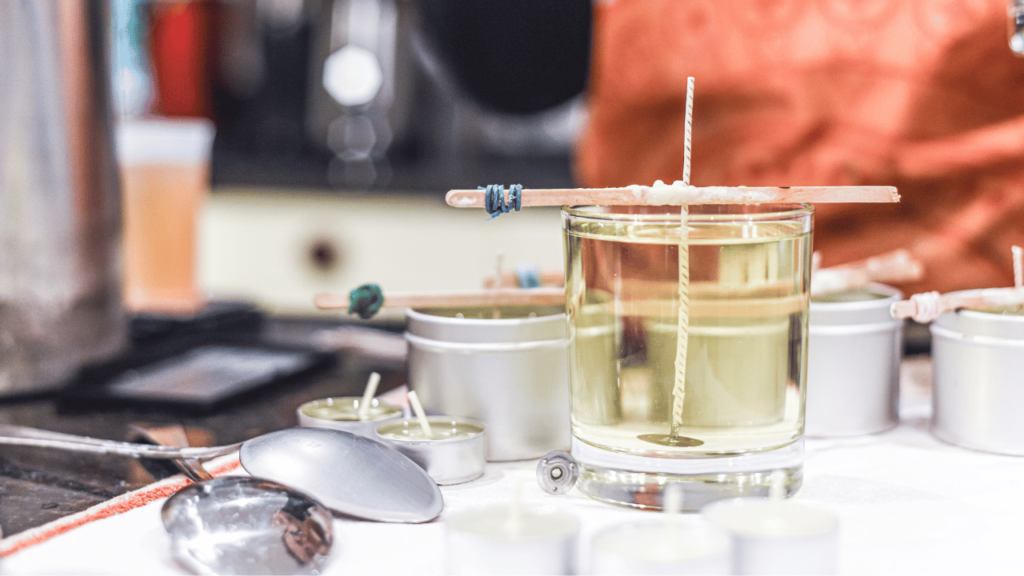
Looking for a creative and relaxing new hobby? Candle-making might be just what you need! This simple and enjoyable activity is perfect for seniors who want to express their creativity, make personalized gifts, or add a warm glow to their home. Best of all, it doesn’t require a lot of space, time, or money to get started. This article is proudly sponsored by SeniorHMOPPOplans.com, your trusted partner in supporting a fulfilling and active senior lifestyle. Explore SeniorHMOPPOplans.com for Medicare Advantage plans tailored to your needs. Here’s everything you need to know to start making your own candles: Why Candle-Making is Perfect for Seniors Relaxing and Therapeutic: The process of crafting candles can help reduce stress and promote mindfulness. Cost-Effective: You can make candles for a fraction of the price of store-bought options. Personalized Gifts: Handmade candles make thoughtful presents for loved ones. Materials You’ll Need Wax: Choose from soy, beeswax, or paraffin wax. Wicks: Select the right size for your container or mold. Containers or Molds: Use jars, tins, or silicone molds. Fragrance Oils: Add a pleasant scent to your candles. Dyes: Optional if you want to color your candles. Double Boiler or Microwave-Safe Container: For melting wax safely. Wick Holders: To keep your wick centered while pouring. Step-by-Step Guide 1. Melt the Wax Use a double boiler to slowly melt your wax over low heat. If you don’t have a double boiler, a heat-safe bowl placed over a pot of boiling water works just as well. 2. Add Fragrance and Color Once the wax is melted, add a few drops of fragrance oil and stir gently. If you’re using dye, add it now to achieve your desired color. 3. Prepare the Wick Secure the wick to the center of your container using a wick holder or adhesive. Make sure it stays upright. 4. Pour the Wax Carefully pour the melted wax into your container, leaving some space at the top. Let the wax cool and solidify completely. 5. Trim the Wick Once the candle is fully set, trim the wick to about ¼ inch. Safety Tips Avoid overheating the wax to prevent burns or fumes. Work in a well-ventilated area. Keep children and pets away from hot wax and sharp tools. Use protective gloves for added safety. Enjoy Your Creations Light your handmade candles to add a cozy ambiance to your home or give them as heartfelt gifts. The satisfaction of crafting something with your own hands makes this hobby truly rewarding. At SeniorSearching.com, we’re dedicated to helping seniors discover new hobbies and enjoy their best years. Visit us for more creative ideas and inspiration. And don’t forget to check out SeniorHMOPPOplans.com for Medicare plans that support your health and wellness.
Find Your Zen: A Senior’s Guide to Candle-Making at Home
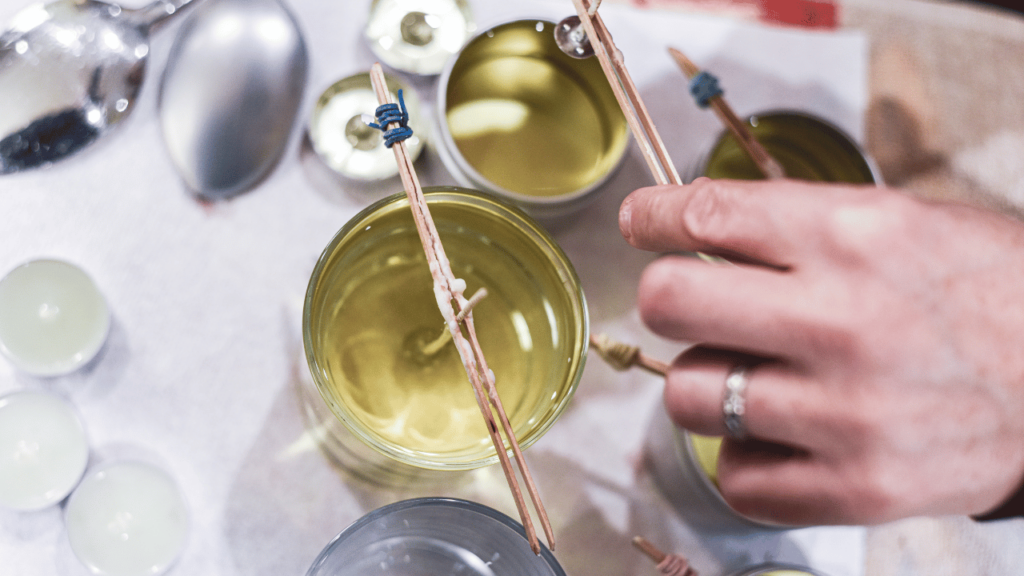
Imagine the soothing scent of lavender filling your home as you create your own handcrafted candles. Candle-making is more than just a craft—it’s a relaxing, creative hobby that’s perfect for seniors looking for a new way to unwind and express themselves. Whether you want to make candles for your own home or as thoughtful gifts, this guide will walk you through the basics. Sponsored by SeniorHMOPPOplans.com, this article will help you get started with candle-making and enjoy the benefits of this calming and rewarding pastime. Why Candle-Making is Great for Seniors Candle-making offers numerous benefits, making it an ideal hobby for seniors: Encourages Relaxation: The process of melting wax and adding soothing scents promotes mindfulness and calmness. Creative Expression: Experiment with colors, shapes, and fragrances to design unique candles. Affordable and Accessible: With just a few supplies, you can create beautiful candles at home. Gathering Your Materials Starting your candle-making journey is easy with the right tools and supplies: Wax: Choose from soy, beeswax, or paraffin depending on your preference. Wicks: Pre-waxed wicks with tabs are beginner-friendly. Containers or Molds: Use jars, tins, or silicone molds for shaping your candles. Double Boiler: Essential for melting wax safely. Fragrance Oils: Add scents like lavender, vanilla, or eucalyptus for a personal touch. Color Dyes: Optional for adding vibrant or subtle colors to your candles. Step-by-Step Guide to Candle-Making Follow these simple steps to create your first candle: Melt the Wax: Use a double boiler to melt the wax gently. Stir occasionally for an even consistency. Prepare the Wick: Secure the wick in the center of your container or mold using a wick holder or chopstick. Add Fragrance and Color: Once the wax is fully melted, remove it from heat and stir in your chosen fragrance oil and dye. Pour the Wax: Carefully pour the melted wax into your container, holding the wick upright. Leave space at the top. Let It Set: Allow the candle to cool and solidify for a few hours. Trim the wick to about half an inch before lighting. Decorating and Displaying Your Candles Personalize your candles to make them uniquely yours: Add Decorative Touches: Layer different colors, embed dried flowers, or use stencils for patterns. Create Custom Labels: Add handwritten or printed labels to use candles as gifts. Use as Home Decor: Place candles on a tray with decorative stones or greenery for a cozy touch. Therapeutic Benefits of Candle-Making Candle-making isn’t just a craft—it’s a form of therapy: Reduces Stress: The repetitive process of crafting promotes relaxation. Engages the Senses: Working with scents and colors creates a calming sensory experience. Boosts Self-Confidence: Completing a project provides a sense of accomplishment and pride. Conclusion: Light Up Your Life Candle-making is a fulfilling and enjoyable hobby that combines creativity, relaxation, and practicality. Whether you’re creating candles for yourself or as gifts, this craft offers endless possibilities for fun and mindfulness. Visit SeniorSearching.com for more hobby ideas and inspiration tailored for seniors. And remember, SeniorHMOPPOplans.com is here to support your health and happiness every step of the way. Ready to light up your life? Let’s get started!
Bring Birds to Your Garden: A Senior’s Guide to DIY Birdhouses
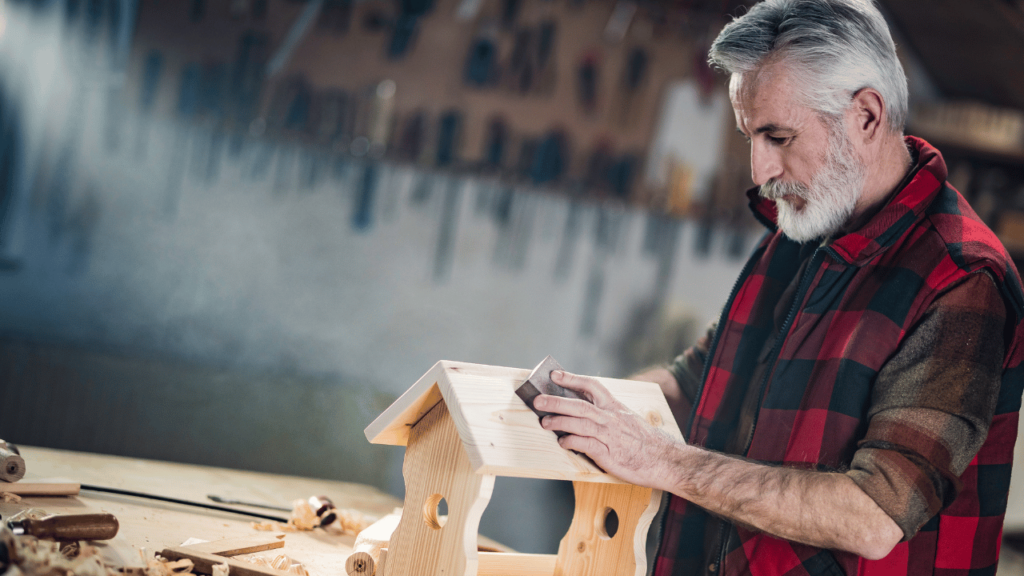
Watching birds flutter around your garden brings joy, color, and life to your outdoor space. Building your own birdhouse is a wonderful way to encourage biodiversity, exercise your creativity, and enjoy a fun and rewarding project. Whether you’re a seasoned DIY enthusiast or trying your hand at crafting for the first time, this guide will walk you through creating a birdhouse step-by-step. Sponsored by SeniorHMOPPOplans.com, this guide will help you bring birds to your garden while creating a charming personal touch for your outdoor space. Why Build a DIY Birdhouse? Building a birdhouse isn’t just a fun project; it also benefits your garden and local ecosystem: Provide a Home for Birds: Help local bird populations thrive by giving them a safe place to nest. Relax and Unwind: Crafting is a great way to reduce stress and enjoy a mindful activity. Beautify Your Garden: A birdhouse adds a unique and decorative element to your outdoor space. Materials You’ll Need Before you begin, gather the following materials: Wood Planks: Pine or cedar are excellent options. Avoid treated wood, which can be harmful to birds. Nails, Screws, and Wood Glue: To assemble your birdhouse securely. Paint or Stain: Use bird-safe, non-toxic paint to decorate your creation. Basic Tools: Hammer, screwdriver, saw, drill, and measuring tape. Step-by-Step Instructions Creating your birdhouse is simple with these steps: Cut the Pieces: Cut the wood into the required pieces: front, back, sides, roof, and base. Ensure the front panel has an entrance hole. A 1.5-inch diameter hole is ideal for most small birds. Assemble the Birdhouse: Attach the sides to the base using nails or screws. Secure the front and back panels, ensuring the entrance hole is unobstructed. Attach the roof to protect the birdhouse from rain. Decorate Your Birdhouse: Paint or stain the wood in your preferred colors. Keep it simple or add creative patterns. Allow the paint to dry completely before hanging the birdhouse. Where and How to Hang Your Birdhouse The placement of your birdhouse is key to attracting birds: Choose a Quiet Spot: Hang the birdhouse away from busy areas and predators. Height Matters: Position it 5 to 10 feet off the ground for safety. Secure It Firmly: Use a tree, pole, or fence post to ensure the birdhouse stays stable. Enjoying Your Finished Birdhouse Once your birdhouse is up, it’s time to enjoy the fruits of your labor: Watch and Learn: Observe the birds that visit your garden and note their behaviors. Expand Your Project: Build additional birdhouses to attract different bird species. Share the Joy: Host a birdwatching day with friends or family to showcase your work. Conclusion: Start Your DIY Birdhouse Project Today Building a birdhouse is a simple yet meaningful way to connect with nature, enhance your garden, and enjoy a hands-on project. Whether you’re crafting solo or with loved ones, this activity is sure to bring joy and satisfaction. Visit SeniorSearching.com for more creative ideas to enrich your retirement. And remember, SeniorHMOPPOplans.com is here to support your health and happiness every step of the way. Ready to welcome some feathered friends? Let’s get building!
Preserve Precious Memories: How to Create a Retro Family Photo Wall
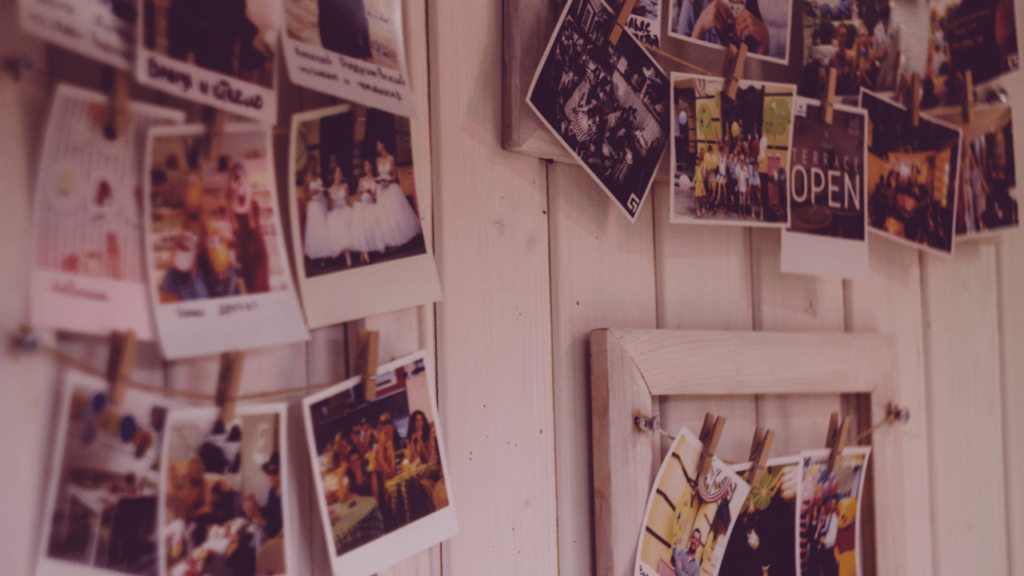
Family photos tell the stories of our lives. Each picture holds cherished memories, from milestones and celebrations to simple everyday moments. Creating a retro-inspired family photo wall is a beautiful way to bring those memories to life while adding a personal touch to your home decor. Whether you’re a DIY enthusiast or simply looking for a meaningful project, this guide will help you design a stunning and nostalgic display. Sponsored by SeniorHMOPPOplans.com, this step-by-step guide will walk you through creating a photo wall that celebrates your family’s unique history. Why a Retro Photo Wall? A retro family photo wall is more than just a decorative piece. It’s a way to: Celebrate Family History: Showcase generations of loved ones in a creative and heartfelt way. Create Conversation: Spark storytelling and shared memories with family and visitors. Personalize Your Home: Add a unique, meaningful feature to your living space. Gathering Your Photos and Materials To get started, you’ll need the right photos and tools: Choose Your Photos: Mix vintage prints with newer memories for a dynamic look. Include a variety of sizes and styles to keep the display visually interesting. Gather Your Supplies: Picture frames in retro styles (wood, brass, or bold colors). Photo-safe adhesives or hanging strips. Measuring tape, level, and pencil for precise hanging. Digitize Old Photos: If needed, scan vintage photos to make reprints or create digital backups. Use photo-editing software to enhance clarity and color. Designing Your Photo Wall The layout of your photo wall sets the tone for your display. Consider these tips: Select the Right Wall Space: Choose a prominent area, such as the living room, hallway, or staircase. Ensure there’s enough natural or artificial lighting to highlight the display. Choose a Layout Style: Grid: Neat rows and columns for a clean, uniform look. Salon-Style: A more eclectic arrangement with varying frame sizes and shapes. Timeline: Chronologically arrange photos to tell your family’s story over time. Incorporate Decorative Elements: Add vintage clocks, small mirrors, or plaques to enhance the retro theme. Use patterned wallpaper or a painted accent wall as a backdrop. Assembling and Displaying Your Wall Now it’s time to bring your photo wall to life: Plan the Layout: Arrange frames on the floor first to visualize the final look. Take a photo of your arrangement to use as a reference. Hang the Frames: Start with the largest frame in the center and work outward. Use a level and measuring tape for precise placement. Highlight the Display: Use picture lights or spotlights to emphasize key elements. Ensure there’s no glare on the glass by angling the lighting properly. The Joy of Sharing Family Memories Your retro photo wall isn’t just a project—it’s a conversation starter. Here are ways to make the most of your display: Involve Your Family: Invite loved ones to contribute photos or ideas for the layout. Host a “Photo Wall Reveal” Party: Share the completed display with friends and family during a small gathering. Keep It Dynamic: Update the wall with new photos or rotate seasonal themes. Conclusion: Start Your Retro Photo Wall Today Creating a retro family photo wall is a fulfilling way to celebrate your loved ones and preserve precious memories. It’s a meaningful project that combines creativity, nostalgia, and personal connection, making your home truly one-of-a-kind. Visit SeniorSearching.com for more creative project ideas and inspiration tailored to seniors. And remember, SeniorHMOPPOplans.com is here to support your health and happiness every step of the way. Ready to bring your memories to life? Let’s get started!
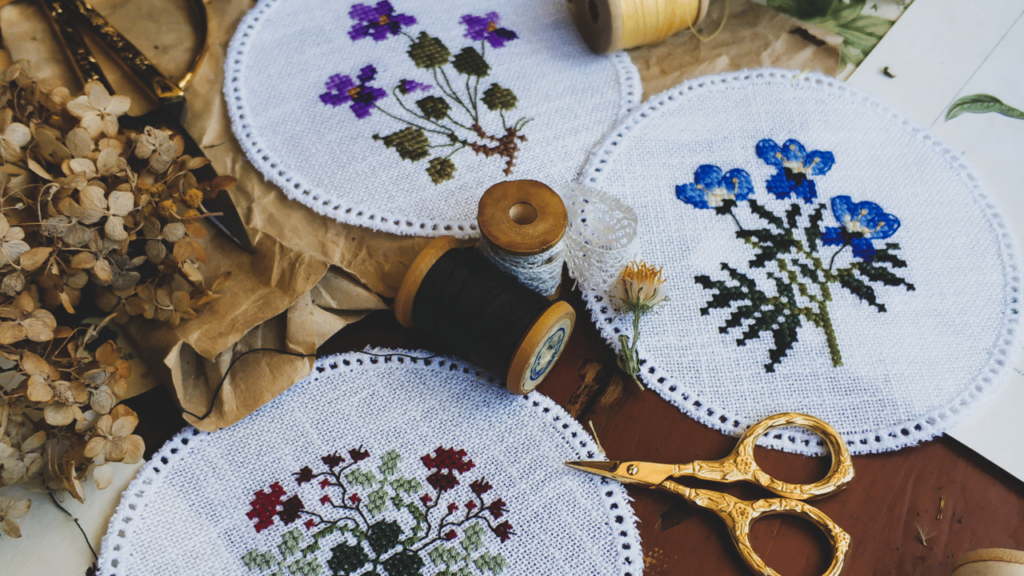
How to Make Pressed Flower Art for Home Décor

Pressed flower art is a timeless and elegant way to preserve the beauty of nature while creating unique decorations for your home. For seniors, this hobby offers relaxation, creativity, and a connection to cherished memories, as flowers from your garden can become stunning works of art. Why Try Pressed Flower Art? Pressed flower art isn’t just about decoration; it’s a way to capture the fleeting beauty of nature and turn it into something lasting. This hobby is: Relaxing: The process of arranging flowers is meditative and calming. Creative: Each piece is unique, reflecting your personal style. Affordable: Requires minimal materials and tools. Sentimental: Preserving flowers from special occasions adds emotional value. Sponsored by SeniorHMOPPOplans.com: “Good health ensures you can enjoy hobbies and activities that enrich your life. Visit SeniorHMOPPOplans.com to find a Medicare Advantage plan tailored to your needs.” Materials You’ll Need Getting started with pressed flower art requires just a few items: Fresh Flowers: Pick flowers that are vibrant and flat. Popular choices include pansies, daisies, and ferns. Heavy Books or a Flower Press: For pressing and drying the flowers. Parchment Paper: To protect the flowers during pressing. Frame or Canvas: For displaying your finished artwork. Tweezers: To handle delicate flowers. Glue or Mod Podge: For securing flowers to your surface. Scissors: For trimming stems and arranging pieces. Step-by-Step Guide to Pressing Flowers Pick Your Flowers: Choose flowers with bright colors and flat shapes. Harvest them when they are dry and fresh. Prepare for Pressing: Place flowers between sheets of parchment paper to prevent sticking. Press the Flowers: Sandwich the parchment paper between heavy books or use a flower press. Leave for 1–2 weeks until completely dry and flat. Check for Dryness: Ensure the flowers are fully dried to prevent mold. Creating Your Pressed Flower Art Select a Surface: Choose a frame, canvas, or card for your artwork. Arrange Your Flowers: Use tweezers to create your desired design before gluing. Secure the Flowers: Apply glue sparingly to the back of each flower and press gently onto the surface. Protect Your Art: Seal the artwork with Mod Podge or place it under glass in a frame. Display with Pride: Hang your finished piece in your home or gift it to a loved one. Creative Ideas for Pressed Flower Art Personalized Gifts: Create framed art pieces for birthdays, anniversaries, or holidays. Decorative Cards: Use pressed flowers to embellish greeting cards. Wall Art: Design larger pieces to brighten up living spaces. Bookmarks: Craft unique bookmarks with laminated pressed flowers. Benefits of Pressed Flower Art Mindfulness: Encourages focus and reduces stress. Connection to Nature: Brings the beauty of the outdoors into your home. Affordable Hobby: Uses simple, inexpensive materials. Sentimental Value: Preserves special memories through flowers. Frequently Asked Questions Q: What flowers work best for pressing? A: Flat flowers like pansies, daisies, and violets work well. Ferns and small leaves are also great additions. Q: How long does it take to press flowers? A: Typically, 1–2 weeks, but a microwave flower press can speed up the process. Q: Can I use pressed flowers for other crafts? A: Absolutely! Pressed flowers are perfect for scrapbooking, journaling, and DIY candles. Make It a Social Activity Host a Crafting Party: Invite friends or family to create pressed flower art together. Join a Club: Connect with local crafting or gardening groups. Share Your Art: Gift your creations to loved ones or display them in community spaces. Resources and Inspiration Find inspiration in nature, online crafting communities, or books about pressed flower art. Visit SeniorSearching.com for more creative hobbies and activities tailored for seniors. Sponsored Reminder: “Transforming flowers into art is a joyful way to stay creative. Ensure you have the health to enjoy hobbies like this by visiting SeniorHMOPPOplans.com for personalized Medicare Advantage plans.” Conclusion Pressed flower art is a fulfilling and beautiful hobby that combines creativity, nature, and relaxation. Whether you’re preserving blooms from your garden or crafting gifts for loved ones, each piece of art carries meaning and charm. Start your pressed flower journey today and add a touch of nature to your home!
How to Create Custom Embroidery Patches for Gifts
Retirement is the perfect time to explore creative hobbies that bring joy and purpose. Crafting custom embroidery patches is one such hobby that combines artistry with thoughtfulness. These small, handmade designs can transform plain items into personalized treasures, making them perfect for gifting to loved ones. Why Create Embroidery Patches? Embroidery patches are versatile and meaningful. They allow you to showcase your creativity while offering a heartfelt touch to any gift. Whether for clothing, bags, or home decor, a handmade patch is a unique way to express care and individuality. Sponsored by SeniorHMOPPOplans.com: “Good health ensures you can enjoy hobbies and activities that enrich your life. Visit SeniorHMOPPOplans.com to find a Medicare Advantage plan tailored to your needs.” Materials You’ll Need Creating embroidery patches requires a few basic tools and materials: Fabric: Cotton, felt, or other sturdy materials suitable for embroidery. Embroidery Hoop: To hold the fabric taut while stitching. Embroidery Thread: Choose colors that complement your design. Needles: Embroidery needles with a sharp tip and large eye. Stabilizer: To reinforce the fabric and prevent distortion. Iron-on Adhesive or Backing: For attaching patches to other items. Scissors: For cutting fabric and thread. Pattern or Design: Pre-drawn or freehand sketches. Step-by-Step Guide to Making Custom Embroidery Patches Select Your Design: Choose a simple pattern or create your own. Consider designs like initials, flowers, or symbols that resonate with the recipient. Prepare Your Fabric: Cut a piece of fabric slightly larger than your design. Attach the stabilizer to the back for extra support. Set Up the Hoop: Place the fabric in the embroidery hoop and tighten it to keep the material taut. Thread Your Needle: Choose thread colors that suit your design and tie a knot at the end. Start Stitching: Use basic stitches like backstitch, satin stitch, or French knots to bring your design to life. Trim the Edges: Once the design is complete, cut around the patch, leaving a small border. Attach Backing: Use iron-on adhesive or sew a backing onto the patch to make it easy to attach to items. Finish with a Personal Touch: Add initials, dates, or special details to make it truly unique. Creative Ideas for Embroidery Patches Themed Patches: Create patches based on hobbies, favorite animals, or holiday motifs. Memory Patches: Design patches that commemorate special events or milestones. Gift Enhancements: Use patches to personalize gifts like tote bags, scarves, or quilts. Benefits of Crafting Embroidery Patches This hobby offers more than just beautiful results: Relaxation: The rhythmic motion of stitching can reduce stress and promote mindfulness. Creativity: Each patch is a unique reflection of your artistic vision. Connection: Handmade gifts strengthen relationships with family and friends. Frequently Asked Questions Q: Is embroidery difficult to learn? A: Not at all! Start with simple designs and basic stitches to build confidence. Q: How long does it take to make a patch? A: Small patches can take a few hours, depending on the complexity of the design. Q: Can I wash embroidered patches? A: Yes, but handwashing is recommended to preserve the stitching. Turn Embroidery into a Social Activity Join a Group: Connect with local crafting clubs or online communities to share ideas and inspiration. Host a Workshop: Invite friends or family to create patches together for a fun, memorable experience. Give Back: Make patches for charitable causes or community projects. Resources and Inspiration Explore online tutorials and embroidery pattern websites for ideas. Visit SeniorSearching.com for more creative hobbies and activities designed for seniors. Sponsored Reminder: “Creating custom embroidery patches is a delightful way to share your creativity and love. Ensure you have the health to enjoy hobbies like this by visiting SeniorHMOPPOplans.com for personalized Medicare Advantage plans.” Conclusion Crafting custom embroidery patches is a rewarding hobby that combines creativity, relaxation, and purpose. Whether you’re making a patch for a loved one or simply enjoying the meditative process, this activity brings joy and meaning to your days. Gather your materials, pick a design, and start stitching—your next masterpiece awaits!
How to Start Sculpting with Air-Dry Clay
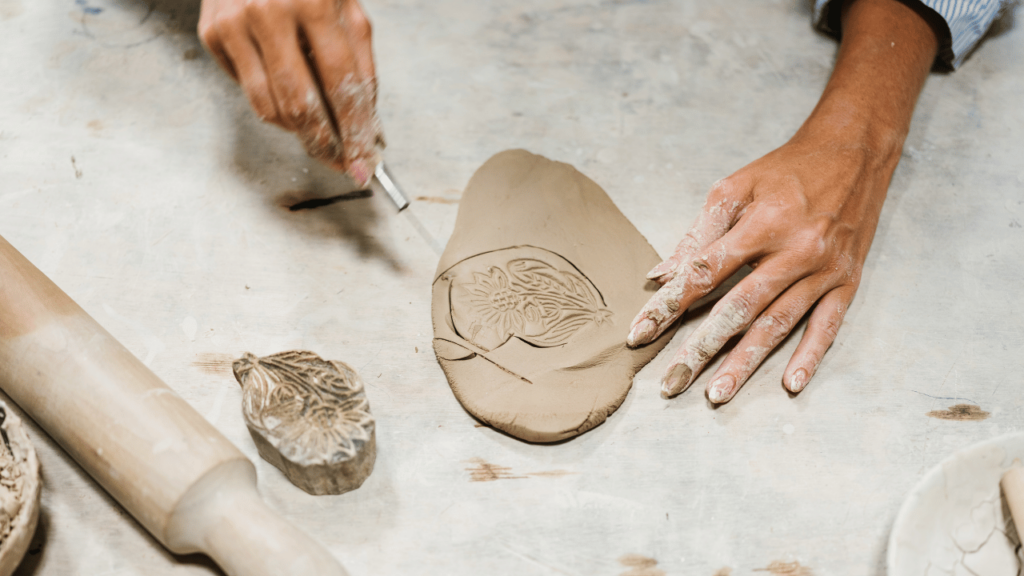
Sculpting with air-dry clay is a delightful way to express your creativity, relax, and create something beautiful with your hands. Whether you’re a seasoned artist or a complete beginner, this hobby is accessible, affordable, and perfect for seniors looking to try something new. At SeniorSearching.com, we’re here to inspire you with activities that bring joy and fulfillment to your retirement years. And because good health is key to enjoying creative hobbies, we’re proud to be sponsored by SeniorHMOPPOplans.com, helping seniors find the best health plans to support their vibrant lifestyles. Why Try Sculpting with Air-Dry Clay? Sculpting with air-dry clay offers many benefits: Relaxes the Mind: The tactile experience of working with clay can reduce stress and promote mindfulness. Enhances Creativity: Create unique, handmade items like vases, figurines, or decorative pieces. Improves Dexterity: Working with your hands can enhance fine motor skills. Requires Minimal Setup: No kiln or oven is needed—air-dry clay hardens naturally. Getting Started Here’s everything you need to begin your sculpting journey: Choose Your Clay: Air-dry clay is available at most craft stores and online. Look for beginner-friendly options that are easy to work with and non-toxic. Gather Basic Tools: You don’t need expensive tools to start. Household items like butter knives, toothpicks, and sponges can double as sculpting tools. Invest in a beginner’s toolset if you want to explore more advanced techniques. Prepare Your Workspace: Cover a table with a non-stick surface like wax paper. Keep a bowl of water nearby to smooth edges and prevent the clay from drying out too quickly. Start with Simple Projects: Begin with basic shapes like bowls, coasters, or small figurines. These projects help you get familiar with the material. Let Your Creations Dry: Once finished, let your clay creations air dry for 24-48 hours. Drying times may vary based on thickness. Paint and Seal: Use acrylic paints to add color, and apply a clear sealant to protect your finished pieces. Tips for Success Keep It Simple: Focus on enjoying the process rather than achieving perfection. Experiment: Mix textures, shapes, and patterns to find your unique style. Work in Small Sections: Clay can dry quickly, so work on one area at a time. Store Unused Clay Properly: Keep leftover clay in an airtight container to prevent it from hardening. FAQs Q: Is air-dry clay safe for beginners? A: Yes! Air-dry clay is easy to work with and requires no special equipment, making it perfect for beginners. Q: Can I create functional items with air-dry clay? A: While you can make decorative items like bowls or vases, air-dry clay is not waterproof. Seal items if they will hold dry objects. Q: How long does it take to dry? A: Most projects dry within 24-48 hours, depending on thickness. Follow the manufacturer’s instructions for best results. Discover More at SeniorSearching.com Sculpting with air-dry clay is a rewarding hobby that nurtures creativity and provides a sense of accomplishment. Discover more fun and inspiring activities at SeniorSearching.com, your trusted resource for seniors. And remember, good health ensures you can fully enjoy creative pursuits. Visit SeniorHMOPPOplans.com today to find a health plan that supports your artistic endeavors and beyond!