")
How to Build a Butterfly Garden: Attract Beauty and Help Pollinators
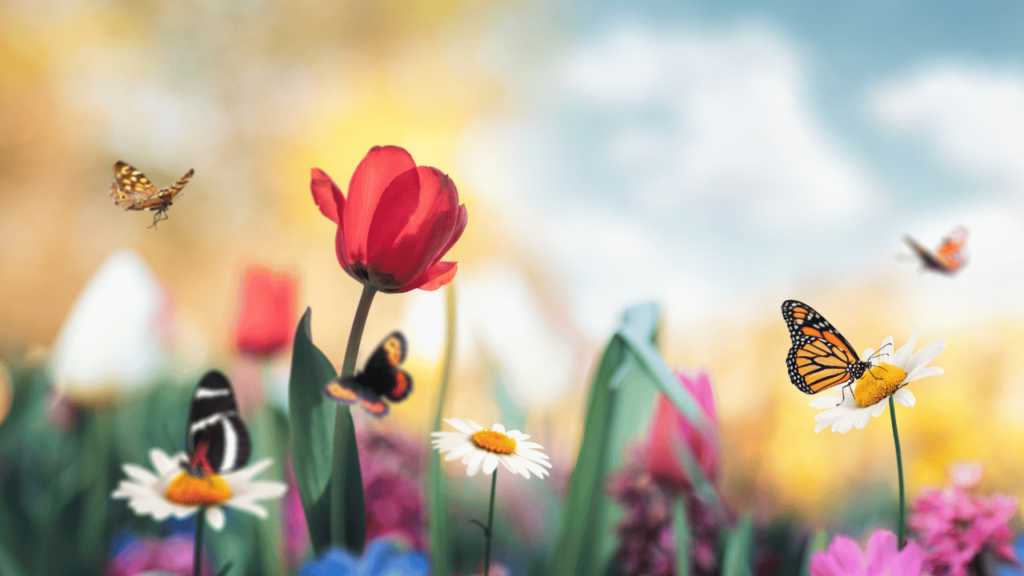
Butterflies bring color, grace, and life to any garden. Beyond their beauty, they play a critical role in pollination, helping plants and flowers thrive. Building a butterfly garden is a simple way to invite these enchanting creatures into your yard while contributing to environmental conservation. Whether you have a sprawling garden or a small patio, you can create a haven for butterflies to enjoy. Pollinators like butterflies and bees are essential to our survival. They are responsible for fertilizing plants, which produces the fruits, vegetables, and seeds we rely on. As the saying goes, “If the bees go, we go.” Supporting pollinators is vital for maintaining biodiversity and ensuring the health of our ecosystems. Good health lets you enjoy nature’s wonders. Visit SeniorHMOPPOplans.com to explore health plans designed for your vibrant lifestyle. Step-by-Step Guide to Creating a Butterfly Garden Choose the Right Location: Select a sunny spot, as butterflies love warmth and light. Ensure the area is sheltered from strong winds to make it more inviting. Pick Butterfly-Friendly Plants: Nectar Plants: Choose flowering plants like milkweed, coneflowers, and lantanas that provide food for adult butterflies. Host Plants: Include plants like parsley, dill, and milkweed where butterflies can lay their eggs and caterpillars can feed. Provide Water Sources: Add a shallow dish filled with water and flat stones for butterflies to perch on while they drink. Create “puddling” spots with moist soil or sand, as butterflies often drink water and absorb minerals from these areas. Incorporate Shelter: Plant shrubs and tall grasses to offer protection and resting spots. Add butterfly houses or small wooden shelters for additional safety. Avoid Chemicals: Skip pesticides and herbicides, as these can harm butterflies and other pollinators. Use natural methods to manage pests and weeds instead. Maintain Your Garden: Deadhead flowers regularly to encourage more blooms. Monitor for invasive weeds and remove them promptly. Keep water sources clean and refreshed. Practical Tips for Success Plant in Groups: Cluster flowers of the same type to make it easier for butterflies to find food. Choose Native Plants: Opt for plants that are native to your region, as they are more likely to attract local butterfly species. Add Color Variety: Brightly colored blooms like purple, red, and yellow are especially attractive to butterflies. Include a Mix of Blooming Seasons: Select plants that bloom at different times of the year to provide continuous food sources. Common Questions Answered What are the best plants for a butterfly garden? Popular choices include milkweed, butterfly bush, zinnias, and marigolds. Native plants are always a great option. How do I keep my garden eco-friendly? Avoid synthetic chemicals and focus on natural gardening practices. Composting and mulching can also enhance soil health. Can I build a butterfly garden in a small space? Yes! Use pots or vertical planters filled with nectar and host plants. Even a small balcony can become a butterfly haven. Why Butterfly Gardens Are Perfect for Seniors Creating a butterfly garden is more than just a hobby—it’s a way to connect with nature, enjoy its beauty, and contribute to the environment. For seniors, it offers an opportunity to stay active, engage in a creative project, and experience the joy of watching butterflies thrive in a space you’ve nurtured. By supporting pollinators like butterflies and bees, you’re helping to sustain the ecosystems that provide food and resources for everyone. Imagine sitting in your garden, sipping tea, and watching vibrant butterflies flit from flower to flower. Picture the satisfaction of knowing you’ve created a sanctuary that benefits both wildlife and the planet. A butterfly garden brings serenity and purpose to your outdoor space. Start your butterfly garden today and bring nature’s beauty to your doorstep! For more inspiration, visit SeniorSearching.com.
How to Start an Indoor Microgreens Garden: Fresh Greens Year-Round
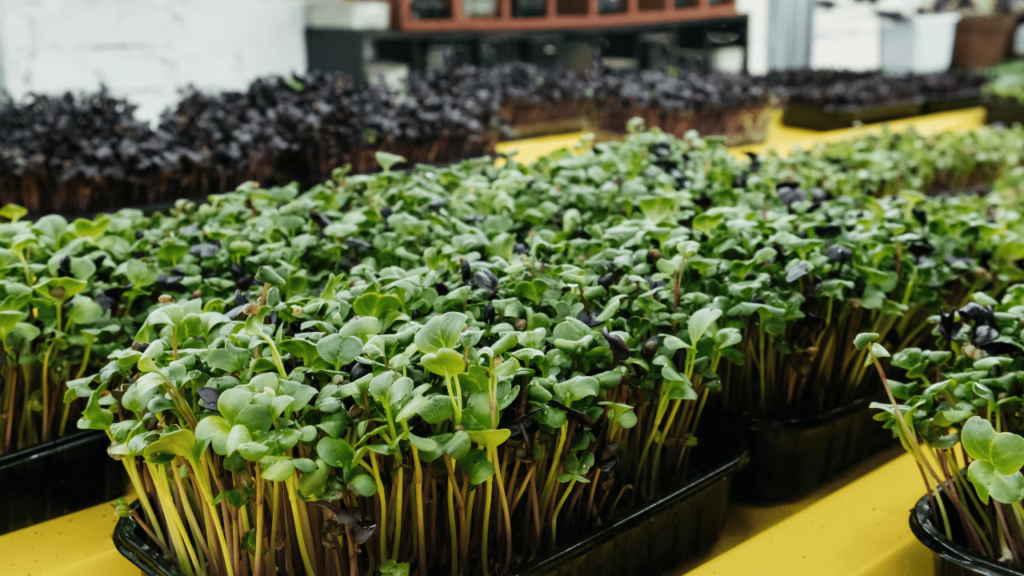
Imagine having fresh, nutritious greens at your fingertips, no matter the season. Starting an indoor microgreens garden is a simple and rewarding hobby that brings the joy of gardening into your home. In just a few weeks, you can grow vibrant, flavorful greens perfect for salads, sandwiches, or garnishes—right on your kitchen counter. Good health begins with great choices. Visit SeniorHMOPPOplans.com to explore health plans designed for active, vibrant living. Step-by-Step Guide to Growing Microgreens Gather Your Supplies: Seeds: Start with easy-to-grow varieties like sunflower, radish, or broccoli. Containers: Use shallow trays, takeout containers, or repurposed baking pans with drainage holes. Soil: Choose a light, well-draining potting mix or coconut coir. Watering Tools: A spray bottle works best for gentle watering. Plant Your Seeds: Fill your container with soil, leaving about an inch of space at the top. Sprinkle seeds evenly across the surface and press them lightly into the soil. Mist the surface with water to keep it moist. Create the Right Environment: Place your trays in a spot with bright, indirect sunlight, such as a windowsill. If natural light is limited, use a grow light to ensure your plants thrive. Cover the trays with a lid or plastic wrap for the first few days to retain moisture. Water and Care: Mist the soil daily to keep it moist but not soggy. Remove the cover once the seeds begin to sprout, usually within 2–3 days. Rotate the trays regularly to ensure even growth. Harvest Your Microgreens: Within 10–14 days, your microgreens will be ready to harvest. Use scissors to cut them just above the soil line. Rinse the greens and enjoy them fresh or store them in the refrigerator for up to a week. Practical Tips for Success Experiment with Varieties: Try different seeds to discover your favorite flavors and textures. Reuse Materials: Repurpose trays or containers to save money and reduce waste. Incorporate Greens Into Meals: Use microgreens to elevate dishes like soups, stir-fries, or wraps. Keep It Simple: Start small with one or two trays and expand as you gain confidence. Common Questions Answered Can I grow microgreens without natural sunlight? Yes! A small grow light provides ample light for healthy growth. What are the nutritional benefits of microgreens? Microgreens are packed with vitamins, minerals, and antioxidants, often containing higher nutrient levels than their mature counterparts. How do I prevent mold in my trays? Ensure good airflow and avoid overwatering. Using trays with drainage holes can also help prevent excess moisture. Why Microgreens Gardening Is Perfect for Seniors Growing microgreens offers more than just fresh produce—it provides a sense of accomplishment and connection to nature. This hobby is ideal for seniors because it requires minimal space, time, and effort while delivering big rewards. The vibrant colors and fresh aromas of microgreens can brighten any room, and harvesting them brings a sense of joy and purpose. Imagine sharing a meal with loved ones featuring greens you grew yourself. Picture the satisfaction of watching tiny seeds transform into lush, edible plants in just a matter of days. Whether you’re a seasoned gardener or a complete beginner, microgreens gardening is a wonderful way to stay active, creative, and healthy. Fresh, healthy, and fun! Start your microgreens garden today. For more tips and ideas, visit SeniorSearching.com.
How to Create a Relaxing Tea Garden at Home

Imagine stepping into your garden and picking fresh herbs to brew a calming cup of tea. A tea garden is a delightful way to combine gardening with relaxation, bringing nature’s tranquility into your daily life. Whether you have a large yard or a small balcony, you can create a peaceful space filled with soothing aromas and vibrant greenery. Good health lets you savor life’s simple pleasures. Visit SeniorHMOPPOplans.com to explore health plans designed for your vibrant lifestyle. Step-by-Step Guide to Starting Your Tea Garden Choose Your Herbs: Start with easy-to-grow herbs that make excellent teas, such as: Chamomile: Known for its calming properties. Mint: Refreshing and easy to grow in pots. Lemon Balm: A fragrant herb with a hint of citrus. Lavender: Adds a touch of elegance and relaxation. Rosemary: Offers a unique, savory twist to herbal teas. Plan Your Space: Garden Beds: Dedicate a section of your yard to herbs. Containers: Use pots or raised beds for a compact, versatile tea garden. Indoor Options: Place pots near sunny windows if outdoor space is limited. Prepare the Soil: Use well-draining soil enriched with compost to give your herbs the nutrients they need. Check individual requirements for each herb, as some prefer drier conditions while others thrive with more moisture. Plant and Care for Your Herbs: Follow planting instructions specific to each herb regarding spacing and sunlight. Water regularly, but avoid overwatering. Most herbs prefer slightly dry conditions. Prune your plants frequently to encourage healthy growth and abundant harvests. Harvest and Dry Your Herbs: Harvest herbs in the morning when their oils are most concentrated. Dry them by hanging small bundles upside down in a cool, dark place or using a food dehydrator. Store dried herbs in airtight containers to preserve their freshness. Practical Tips for Success Add Personal Touches: Decorate your garden with small signs, stones, or fairy lights to make it a relaxing retreat. Label Your Plants: Use decorative labels or markers to identify your herbs. Incorporate Companion Plants: Add flowers like marigolds to attract pollinators and deter pests. Experiment with Blends: Mix different herbs to create your unique tea flavors. Common Questions Answered Can I grow a tea garden in small spaces? Yes! Use pots or vertical planters on balconies or patios. Herbs grow well in compact spaces. What are the health benefits of herbal teas? Herbal teas promote relaxation, improve digestion, and boost immunity. Each herb offers unique benefits, such as chamomile for better sleep or mint for soothing stomach discomfort. How long does it take for herbs to grow? Most herbs are ready to harvest within a few weeks to a couple of months, depending on the plant. Why Tea Gardening Is Perfect for Seniors A tea garden is more than just a collection of plants—it’s a sanctuary. For seniors, it offers a way to stay active, enjoy nature, and reap the rewards of homegrown herbs. The process of planting, tending, and harvesting herbs is both relaxing and fulfilling. Imagine sipping a warm cup of chamomile tea you grew yourself, surrounded by the beauty of your garden. Picture sharing your herbal blends with friends and family, adding a personal touch to your gatherings. A tea garden is not just about the tea—it’s about creating moments of peace, joy, and connection. Start your tea garden today and discover the joy of fresh, homegrown relaxation! For more inspiration, visit SeniorSearching.com.
The Benefits of Creating a Butterfly Garden on a Budget

Imagine stepping into your backyard and being greeted by the gentle fluttering of vibrant butterflies. These delicate creatures don’t just bring beauty—they create a peaceful atmosphere that soothes the soul. Creating a butterfly garden doesn’t have to be expensive or complicated. With a little planning and creativity, you can transform your outdoor space into a haven for butterflies, all while staying within your budget. Good health allows you to enjoy nature to its fullest. Visit SeniorHMOPPOplans.com to explore health plans designed for vibrant living. Step-by-Step Guide to Creating a Butterfly Garden Choose the Right Location: Butterflies love sunny spots, so pick an area with at least 6 hours of sunlight daily. Ensure the space is sheltered from strong winds, as butterflies prefer calm environments. Select Native Plants: Native plants are easier to grow and provide the food butterflies need. Look for flowers like milkweed (for Monarchs), black-eyed Susan, and butterfly bush. Incorporate both nectar plants for adult butterflies and host plants for caterpillars to complete their life cycle. Create Butterfly-Friendly Habitats: Add flat stones where butterflies can bask in the sun to warm their wings. Create a puddling station by placing a shallow dish of water with sand or stones for butterflies to drink and absorb minerals. Use Affordable Gardening Techniques: Collect seeds from friends or community gardening groups instead of buying new ones. Repurpose containers or use recycled materials for plant pots. Mulch with grass clippings or shredded leaves to retain soil moisture and reduce costs. Keep It Simple: Start small with a few plants and expand as you become more confident. Enjoy the process—it’s as much about creating a relaxing space for yourself as it is for the butterflies. Practical Tips for Success Plan for Blooms Year-Round: Choose plants that bloom at different times of the year to keep your garden vibrant and full of visitors. Avoid Pesticides: These can harm butterflies and other beneficial insects. Use natural solutions to manage pests instead. Group Plants: Place similar plants together to make it easier for butterflies to find food. Common Questions Answered What plants are best for attracting butterflies? Milkweed, lantana, and zinnias are excellent nectar sources, while parsley and dill make great host plants for caterpillars. How do I create a butterfly garden in a small space? Use pots or vertical planters on a balcony or patio. Even a small garden can attract butterflies if it includes their favorite plants. Can I include other pollinators in my garden? Absolutely! Bees and hummingbirds often visit the same plants as butterflies, making your garden a buzzing oasis of activity. Why Butterfly Gardening Is Perfect for Seniors Butterfly gardening isn’t just about flowers and insects—it’s about connecting with nature and finding joy in simple pleasures. Watching butterflies flit from bloom to bloom is both relaxing and inspiring. The physical activity of planting and maintaining a garden keeps you active, while the peaceful environment promotes mental well-being. Creating a butterfly garden can also be a social activity. Invite friends or neighbors to share seeds and gardening tips, or host a garden tour to showcase your efforts. The rewards go beyond aesthetics, providing a sense of accomplishment and a deeper appreciation for the natural world. Turn your backyard into a haven for butterflies and your soul. Visit SeniorSearching.com for more tips and inspiration!
How to Grow Orchids Indoors: A Beginner’s Guide
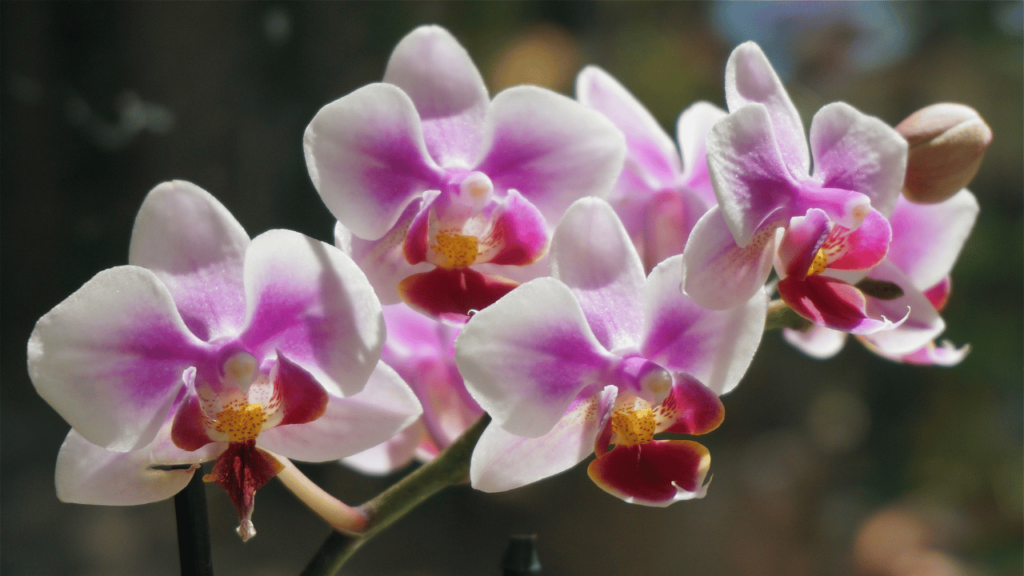
Orchids are known for their elegance and beauty, often seen as a challenge to grow. But did you know that with just a little knowledge and care, these stunning flowers can thrive right in your home? Growing orchids indoors can transform your space into a serene haven and bring daily moments of joy. Remember: To enjoy hobbies like this to the fullest, good health is essential. Visit SeniorHMOPPOplans.com to explore health plans that support the lifestyle you love. Step-by-Step Guide to Growing Orchids Indoors Choose the Right Orchid: For beginners, Phalaenopsis orchids (moth orchids) are an excellent choice. They’re hardy, easy to care for, and come in stunning colors. Set Up the Right Environment: Light: Place your orchid in indirect sunlight—near an east or west-facing window works best. Temperature: Keep the room between 65-75°F for optimal growth. Humidity: Orchids love humidity, so consider using a small humidifier or placing a tray of water near the plant. Water and Feed Your Orchid: Water once a week, ensuring the potting mix is damp but not soaked. Use a balanced orchid fertilizer (20-20-20) every two weeks during the growing season. Practical Tips for Thriving Orchids Repot Regularly: Repot your orchid every 1-2 years to prevent root rot and encourage healthy growth. Inspect for Pests: Check leaves and flowers for pests like aphids or spider mites and treat them promptly. Encourage Blooms: Mimic a natural light cycle by reducing light exposure slightly in the fall to trigger flowering. FAQs What’s the easiest orchid to grow indoors? Phalaenopsis orchids are beginner-friendly, forgiving, and bloom for several months. How often should I water my orchid? Water weekly, but adjust based on humidity and the dryness of your potting mix. Why This Hobby Is Perfect for Seniors Caring for orchids offers relaxation, focus, and a sense of accomplishment. Watching an orchid bloom after months of care brings a unique joy. For seniors, it’s a mindful activity that fosters both creativity and patience. Transform your home into a sanctuary with the beauty of orchids. For more inspiring ideas, visit SeniorSearching.com.
How to Start a Simple Herb Drying Project at Home
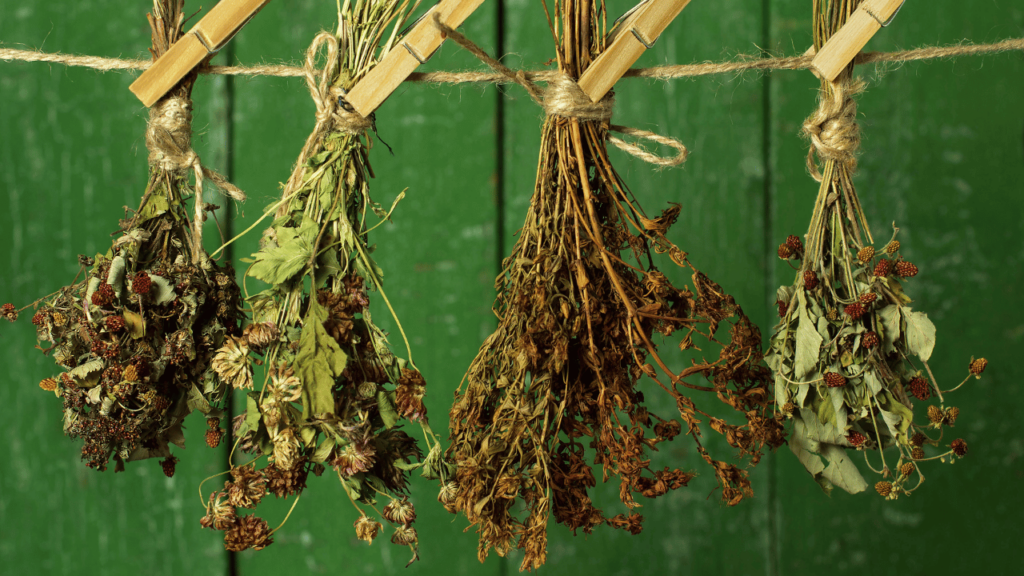
Imagine walking into your kitchen and having fresh, home-dried herbs at your fingertips to flavor your meals, create soothing teas, or even craft homemade gifts. Drying herbs at home is an enjoyable, cost-effective hobby that connects you to nature and enhances your everyday life. At SeniorSearching.com, we bring you inspiring ideas to make your golden years vibrant and rewarding. This article is proudly sponsored by SeniorHMOPPOplans.com, your trusted resource for finding Medicare Advantage plans tailored to seniors. After all, hobbies like this are best enjoyed with good health. Visit SeniorHMOPPOplans.com to secure a plan that keeps you active and thriving. 1. Why Start Drying Herbs at Home? Save Money: Dried herbs at the store can be expensive, but growing and drying your own is budget-friendly. Boost Flavor: Home-dried herbs often have a stronger, fresher taste compared to store-bought ones. Enjoy a Creative Hobby: It’s a simple and relaxing way to enjoy gardening and cooking. 2. Getting Started with Herb Drying Choose the Right Herbs: Start with easy-to-dry options like basil, oregano, mint, rosemary, and thyme. Pick the Perfect Spot: Select a dry, well-ventilated area away from direct sunlight to hang your herbs. Gather Supplies: You’ll need string, scissors, and clean containers to store your dried herbs. 3. Simple Steps to Dry Your Herbs Step 1: Harvest with Care Cut herbs in the morning after dew has dried but before the sun gets too hot. Use clean scissors or pruning shears to avoid damaging the plants. Step 2: Bundle and Hang Gather small bunches of herbs and tie the stems together with string. Hang them upside down in a well-ventilated area. Step 3: Wait and Check Allow 1–2 weeks for the herbs to dry completely. They’re ready when they crumble easily. Step 4: Store Your Herbs Remove the dried leaves and store them in airtight containers. Label each container with the herb’s name and drying date. 4. Tips for Success Experiment with Different Herbs: Expand your collection with lavender, sage, or dill as you grow more confident. Use a Dehydrator: If you prefer a faster method, consider using a food dehydrator. Craft Homemade Gifts: Package your dried herbs in small jars with decorative labels to share with friends and family. Conclusion Starting a simple herb drying project at home is a delightful way to save money, enhance your cooking, and enjoy a creative hobby. At SeniorSearching.com, we’re dedicated to bringing you ideas that enrich your life. Remember, none of this is possible without good health. Visit SeniorHMOPPOplans.com today to find the perfect plan that keeps you healthy and active to enjoy hobbies like this. FAQs Section 1. What herbs are easiest to dry at home? Basil, oregano, rosemary, thyme, and mint are great choices for beginners. These herbs dry quickly and retain their flavor well. 2. How long does it take to dry herbs? Most herbs take 1–2 weeks to dry completely when hung in a well-ventilated area. 3. Can I dry herbs without hanging them? Yes, you can use a food dehydrator or oven on a low setting (100–120°F) to dry herbs quickly. 4. How should I store dried herbs? Store dried herbs in airtight containers, away from light and heat, to preserve their flavor and aroma.
Enhanced Article: How to Build a Bird-Friendly Balcony for Relaxation

Imagine waking up to the soothing sounds of birds chirping right outside your window. Creating a bird-friendly balcony is an easy and rewarding project that brings nature closer to your home. It’s perfect for seniors looking to enjoy wildlife without leaving their living space. Plus, it’s a wonderful way to unwind and connect with nature. And while hobbies like this bring peace of mind, good health ensures you can enjoy them fully. That’s why SeniorHMOPPOplans.com is here to support your well-being, so you can focus on what you love. Why Create a Bird-Friendly Balcony? Relaxation and Joy: Watching birds can reduce stress and boost your mood. Easy and Affordable: Simple materials and setups make this project accessible. Brings Nature to You: Perfect for apartments, condos, or small spaces. Encourages Creativity: Customize your balcony with plants, feeders, and birdhouses. Step-by-Step Guide to Building a Bird-Friendly Balcony Step 1: Choose the Right Plants Birds are attracted to greenery. Add potted plants like: Native flowers for nectar. Shrubs for shelter. Herbs like basil or mint for an extra touch. Step 2: Set Up Feeders Provide a variety of seeds and snacks to attract different birds: Black-oil sunflower seeds for cardinals and finches. Suet cakes for woodpeckers. Mealworms for bluebirds. Step 3: Add Water Features A small birdbath or water dish provides drinking and bathing opportunities. Place it in a shaded area to keep the water cool. Step 4: Include Perches and Birdhouses Hang a small birdhouse or install a perch for birds to rest on. Use materials like untreated wood to make it safe for wildlife. Step 5: Keep It Safe Avoid using pesticides or harmful chemicals. Place feeders away from windows to prevent collisions. Keep pets indoors while birds visit. Tips for Success Clean feeders and water dishes weekly to prevent disease. Observe which birds visit your balcony and adjust food types accordingly. Use lightweight pots to make rearranging plants easier. FAQs 1. Can I attract birds if I live in an urban area? Yes! Birds adapt well to cities. Providing food, water, and shelter will draw them in. 2. How much time does it take to maintain? Just a few minutes a week to refill feeders, water plants, and clean surfaces. 3. Are bird-friendly balconies expensive to set up? Not at all! You can start with basic items like a small feeder and a few potted plants. Personal Story: Linda’s Bird-Friendly Oasis At 64, Linda transformed her apartment balcony into a haven for birds. “It’s incredible to see so many species visit every day,” she says. “The chirping in the morning makes my coffee time extra special.” Thanks to her Medicare Advantage plan from SeniorHMOPPOplans.com, Linda enjoys the energy and focus to maintain her peaceful retreat. Why Health Matters for Enjoying Nature Activities like building a bird-friendly balcony bring relaxation and joy, but staying healthy ensures you can enjoy them to the fullest. That’s why SeniorHMOPPOplans.com helps seniors find health plans tailored to their needs. Visit SeniorSearching.com for more ideas to enrich your life. Call-to-Action Ready to create your bird-friendly balcony? Visit SeniorSearching.com for more step-by-step guides and creative projects designed for seniors.
Turn Kitchen Scraps into Gold: How Seniors Can Set Up a Worm Composting Bin at Home
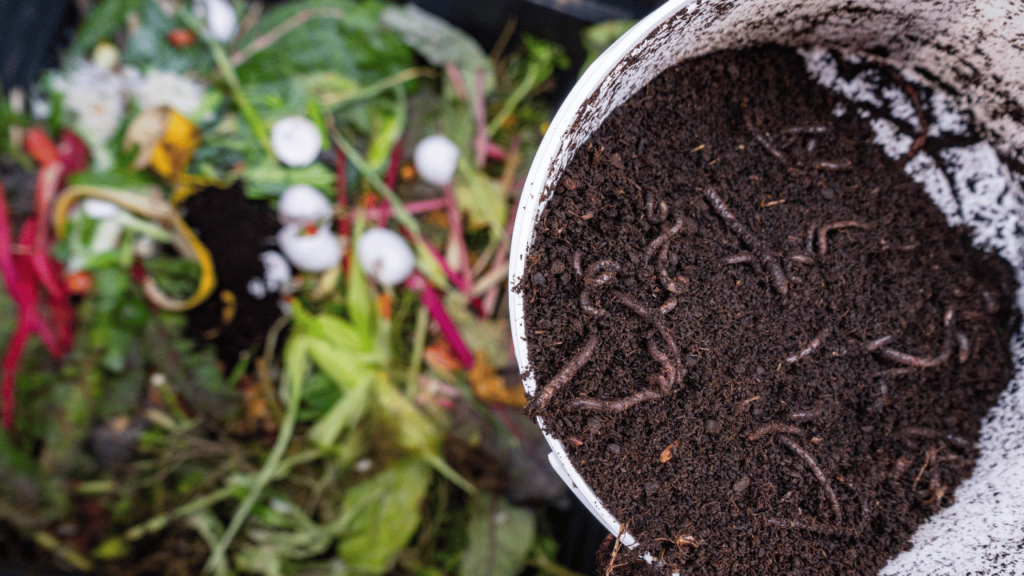
Imagine turning your kitchen scraps into rich, garden-friendly compost—all while reducing waste. Worm composting is an easy, eco-friendly hobby that’s perfect for seniors. It doesn’t take much space, effort, or money, and it’s surprisingly rewarding. Ready to get started? Let’s dive into this step-by-step guide. Why Worm Composting is Perfect for Seniors Eco-Friendly: Reduce waste while helping the environment. Great for Gardening: Worm compost, or “black gold,” enriches your plants like nothing else. Simple and Low Maintenance: A few minutes each week is all it takes. Relaxing and Fulfilling: Watching your compost grow can be surprisingly therapeutic. Step-by-Step Guide to Worm Composting Step 1: Choose Your Bin You don’t need a big garden for worm composting—a small bin works fine indoors or outdoors. Look for a plastic or wooden container with a lid. Make sure it’s no deeper than 12–18 inches so the worms can breathe. Step 2: Prepare the Bedding Your worms need a cozy place to live. Shred some newspaper or cardboard, moisten it, and add it to the bin. Bedding should feel like a damp sponge—not too wet, not too dry. Step 3: Add the Worms The best worms for composting are red wigglers, which you can buy online or at a garden store. You’ll need about 1 pound of worms to start. Step 4: Feed the Worms Worms love kitchen scraps! Start with: Fruit and veggie peels. Coffee grounds. Eggshells (crushed). Avoid meat, dairy, and oily foods—they can attract pests. Step 5: Harvest the Compost In 3–6 months, your bin will be full of nutrient-rich compost. Push the compost to one side of the bin and add fresh bedding and food to the other. The worms will migrate, leaving you with ready-to-use compost. Frequently Asked Questions 1. Does worm composting smell? No! When done right, your bin will smell earthy and fresh. 2. Can I compost indoors? Absolutely! A well-maintained bin is perfect for an apartment or small home. 3. How much do worms eat? About half their weight in food scraps per day. Start small and adjust as needed. Linda’s Worm Composting Journey At 65, Linda was looking for a relaxing hobby that also helped her garden. She started worm composting with a small bin on her patio. Within weeks, she was hooked! “It’s amazing how much waste I’ve reduced,” she says. “And my tomatoes have never looked better.” Tips for Success Keep the bin in a cool, shaded spot to prevent overheating. Check moisture levels regularly—worms like a damp environment. Use finished compost in your garden or indoor plants for healthy growth. Sponsorship Mention This article is proudly brought to you by SeniorHMOPPOplans.com, your trusted partner for staying healthy and active. Discover more hobbies and ideas for seniors at SeniorSearching.com. Call-to-Action Start turning kitchen scraps into “black gold” today! Visit SeniorSearching.com for more eco-friendly tips and senior-friendly hobbies. Enhancements for Facebook Audience Simple Steps: Easy-to-follow instructions designed for quick understanding. Personal Story: Relatable and inspirational to engage readers emotionally. FAQs: Addresses common concerns seniors may have, boosting confidence to try composting. Emphasis on Benefits: Highlights eco-friendliness and gardening perks. This article is optimized for a 64-year-old Facebook audience, ensuring it’s engaging, actionable, and aligned with their interests. Redrafted Article: “Turn Kitchen Scraps into Gold: How Seniors Can Set Up a Worm Composting Bin at Home” Introduction Imagine turning your kitchen scraps into rich, garden-friendly compost—all while reducing waste and supporting a healthier lifestyle. Worm composting is an easy, eco-friendly hobby that’s perfect for seniors. Not only does it create nutrient-rich soil for your plants, but it also offers a relaxing way to connect with nature and stay active. And while hobbies like this bring joy and fulfillment, good health is essential to enjoy them to the fullest. That’s why SeniorHMOPPOplans.com is here to support your well-being so you can focus on enriching activities like this. Why Worm Composting is Perfect for Seniors Eco-Friendly: Reduce waste and contribute to a healthier planet. Gardening Perks: Your plants will thrive with the nutrient-packed compost worms create. Relaxing and Rewarding: Watching scraps transform into compost is deeply satisfying. Low Maintenance: Spend just a few minutes a week managing your bin. Worm composting can help seniors stay connected to meaningful hobbies that encourage healthy living, an essential part of staying vibrant and active in later years. Step-by-Step Guide to Worm Composting Step 1: Choose Your Bin Whether you live in a house or an apartment, you can set up a composting bin almost anywhere. A small plastic or wooden container with a lid works well. Keep it in a cool, shaded spot indoors or outdoors. Step 2: Prepare the Bedding Start with moist bedding like shredded newspaper or cardboard. Worms need a damp, cozy environment—think of it as their little home. Step 3: Add the Worms Red wigglers are ideal for composting. You can find them online or at a local garden store. One pound of worms is perfect for beginners. Step 4: Feed the Worms Your worms will thrive on simple kitchen scraps like: Fruit and veggie peels. Coffee grounds. Crushed eggshells. Avoid meat, dairy, and oily foods, which can attract pests. Adding the right mix of scraps ensures your worms stay happy and productive. Step 5: Harvest the Compost In about 3–6 months, you’ll have beautiful compost to use in your garden or with indoor plants. Simply push the finished compost to one side of the bin, add fresh bedding and scraps to the other side, and let the worms migrate. Frequently Asked Questions 1. Does worm composting smell? Not at all! When properly maintained, your bin will smell earthy and clean. 2. How much do worms eat? Worms can eat about half their weight in food scraps per day. Adjust feeding amounts as needed. 3. Can I compost indoors? Absolutely! A small, well-ventilated bin works perfectly inside your home. Personal Story Linda, 65, was looking for a relaxing hobby that fit into
Bring Nature Indoors: How to Create a DIY Terrarium for Seniors
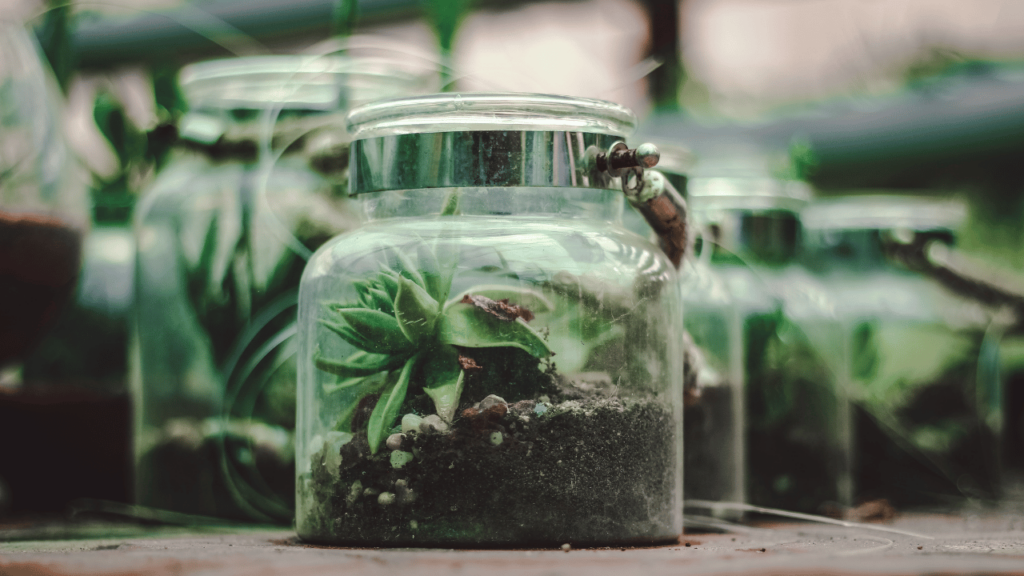
Terrariums are miniature gardens that bring a touch of nature indoors. They’re easy to make, low-maintenance, and offer a calming, creative activity for seniors. Sponsored by SeniorHMOPPOplans.com, this guide will show you how to design and care for a DIY terrarium step by step. Along the way, you’ll learn tips for customization and long-term enjoyment. For more engaging ideas tailored to seniors, visit SeniorSearching.com! Why Create a Terrarium? Terrariums offer more than just a decorative touch to your home. Here are some reasons why seniors love creating them: Relaxation: The process of assembling and tending to a terrarium is meditative and stress-relieving. Creative Outlet: Personalizing your terrarium allows for self-expression. Low Maintenance: Terrariums require minimal care, making them ideal for those seeking a hassle-free hobby. Connection with Nature: Even without a garden, you can enjoy the beauty of plants in a compact space. Step 1: Gather Your Supplies To get started, you’ll need the following materials: Glass Container: A jar, fishbowl, or vase works well. Ensure it’s clear for visibility. Small Rocks or Pebbles: Used for drainage at the base. Activated Charcoal: Prevents odors and keeps the terrarium fresh. Potting Soil: Choose soil suited for the type of plants you’ll use. Plants: Select low-maintenance options like succulents, moss, or air plants. Decorative Elements: Add personal touches with small figurines, shells, or colored sand. Pro Tip: Use gloves and small tools for precise placement of materials. Step 2: Prepare the Base A good foundation ensures a healthy terrarium. Follow these steps: Add Pebbles: Place a 1–2-inch layer of small rocks or pebbles at the bottom of the container to help with drainage. Layer Charcoal: Sprinkle a thin layer of activated charcoal over the pebbles to prevent mold and odors. Add Soil: Fill the container with a few inches of potting soil. Adjust the depth based on the size of your plants. Step 3: Select and Arrange Plants Choose plants that thrive in similar conditions: Succulents: Prefer dry conditions and need plenty of light. Mosses: Thrive in shaded, humid environments. Air Plants: Require minimal soil and are easy to rearrange. Arrange the Plants: Start with the largest plant as the focal point, then add smaller plants around it. Use tools like tweezers or a spoon for precise placement. Step 4: Add Decorative Touches Personalize your terrarium with decorative elements: Place small figurines or ornaments for a whimsical touch. Add shells, stones, or sand for a natural look. Use colored sand or gravel to create patterns and layers. Pro Tip: Avoid overcrowding to ensure plants have room to grow. Step 5: Care and Maintenance Terrariums are low-maintenance, but they still need some attention: Watering: Lightly water the soil when it feels dry, but avoid overwatering. Succulents need less water than mosses. Lighting: Place the terrarium in a spot with indirect sunlight. Avoid direct sun, which can overheat the container. Pruning: Remove any dead leaves or overgrown plants to maintain the balance. Step 6: Enjoy Your Creation A DIY terrarium adds beauty and tranquility to your home. It’s also a great conversation starter and a thoughtful gift for friends and family. You can also make themed terrariums, such as seasonal designs or ones inspired by your favorite places. Conclusion: Creating a DIY terrarium is a fun and rewarding way to bring nature into your home. It’s perfect for seniors looking for a creative, low-maintenance project. Ready to start? Visit SeniorSearching.com for more inspiring ideas. And remember, SeniorHMOPPOplans.com is here to support your health and happiness every step of the way!
Grow Fresh and Healthy: How to Create a Miniature Indoor Herb Garden for Seniors
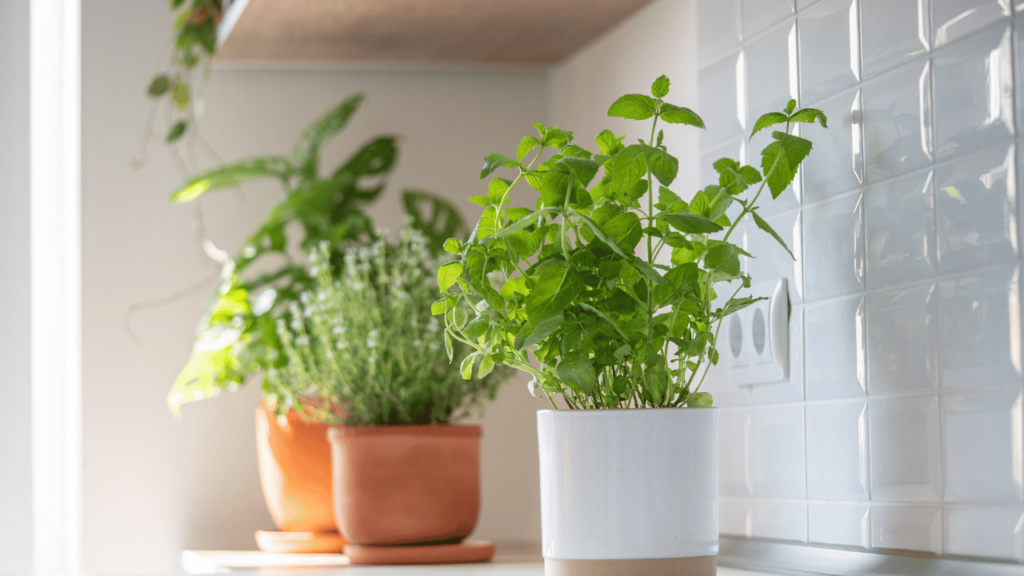
Imagine having fresh herbs at your fingertips, ready to add flavor to your meals. A miniature indoor herb garden is a simple, enjoyable project that brings nature indoors and promotes healthy eating. Sponsored by SeniorHMOPPOplans.com, this guide will help you create a vibrant herb garden right in your home. For more practical and fun ideas tailored to seniors, visit SeniorSearching.com! Step 1: Choose Your Herbs Select herbs that are easy to grow indoors and suit your cooking preferences: Basil: Great for Italian dishes and salads. Parsley: Perfect for soups and garnishes. Mint: Ideal for teas and desserts. Thyme: Adds flavor to meats and vegetables. Chives: A versatile herb for eggs, potatoes, and dips. Step 2: Pick the Right Containers Small pots with drainage holes work best for indoor herb gardens. You can use: Ceramic or terracotta pots. Recycled containers like mason jars (add pebbles for drainage). A wooden or metal planter box for a cohesive look. Step 3: Find the Perfect Spot Herbs need plenty of sunlight to thrive: Place them near a south- or west-facing window with at least 6 hours of sunlight daily. Use a grow light if natural light is limited. Step 4: Use the Right Soil and Fertilizer Herbs grow best in well-draining potting soil: Choose a soil mix labeled for indoor plants or herbs. Feed your herbs with a liquid fertilizer every 4–6 weeks for healthy growth. Step 5: Water and Harvest Properly Taking care of your herbs is easy: Water when the top inch of soil feels dry, but avoid overwatering. Harvest herbs by snipping leaves near the top to encourage new growth. Step 6: Enjoy Your Herb Garden Use your fresh herbs in cooking, teas, or as garnishes. The fragrance and greenery of your herb garden will brighten your home and meals! Conclusion: Creating a miniature indoor herb garden is a rewarding way to enjoy fresh, flavorful herbs while connecting with nature. Ready to get started? Visit SeniorSearching.com for more inspiring ideas. And remember, SeniorHMOPPOplans.com is here to support your health and happiness every step of the way!